It’s the end of the week, but that doesn’t mean an end to learning more about your favorite Apple devices. Each week, the Friday Five takes a quick look at a Mac OS X or iOS app to point out five things you may have overlooked before.
This week we’re not just looking at one app; we’re looking at iOS 9 and the built-in apps that come with it. Although Apple has added a number of features to make the operating system faster and more efficient for users, many of us are still using older gestures and methods out of sheer habit. Here are five tips that can speed up the process of using an iPhone, iPad or iPod touch running iOS 9.
1.) Sorting notifications
Nothing can be more annoying than popping into Notification Center on your iOS device, then needing to scroll down the list of notifications to find the one you’re really interested in. Fortunately, it’s quite easy to sort notifications so that the ones that are most important to you are near the top. By default, notifications are sorted with the most recent at the top, but if you’re more interested in notifications from certain apps you’ll need to manually change the order in which those app notifications appear.
To do that, launch the Settings app (the one that looks a set of gears) and tap Notifications. Tap on Sort Order, and change it from Recent to Manual by tapping Manual.
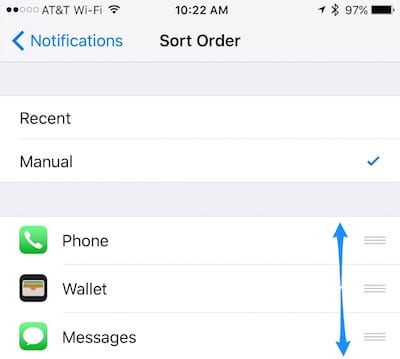
Now you’ll see a list of applications that provide notifications. To increase the priority of an app in Notification Center, place your fingertip on the handle icon (AKA “hamburger icon”) to the right of the app name, then drag the app up in the list. Drop it where you’d like it to be in your priority list. Conversely, dragging an app down the screen decreases its priority.
2.) Deleting alarms with a swipe
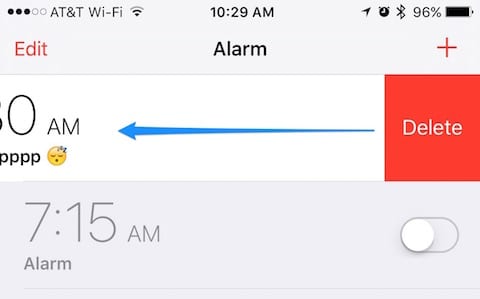
Do you dread setting an alarm on your iOS device because of what a hassle it is to delete it later? That’s not a problem anymore with iOS 9. When the alarm goes off and you want to kill it forever, launch the Clock app, then tap on the Alarm button at the bottom of the display to see your current alarms.
To delete any one of them, just swipe to the left, then tap the red Delete button. No longer will that alarm wake you from your slumbers, and it only took a swipe and a tap.
3.) Select multiple photos for sharing or deletion
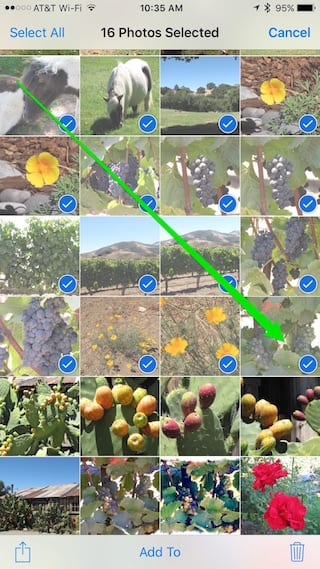
Past versions of iOS made selection of multiple photos for deletion or sharing a pain. You had to tap on “Select”, then literally tap each photo that you wanted to get rid of. In iOS 9, the process is easier and faster — you just drag to select them. Start by launching the Photos app, then open one of your albums (this can be the Camera Roll, My Photo Stream, or any other album that is automatically or manually created).
Tap Select. Find the photo that you want to start or end with, tap on it, and then drag across up or down the group of images. In this example, I started with the photo in the upper left, then dragged to the right and down. Once everything is selected, you can tap the trash button to delete the photos or the share button (lower left) to share the group of photos with others.
4.) Move back to a 4-digit passcode
With iOS 9, Apple made a 6-digit passcode the standard. While this is a great idea for security purposes on non-Touch ID devices — it increases the number of possible passcodes from 10,000 to 1,000,000 — it can get annoying trying to tap in the proper six digits in the correct order every time. Fortunately, you can easily switch back to a 4-digit passcode.
To do this, launch Settings, scroll down to Touch ID & Passcode (it will just say Passcode if your iPhone doesn’t have Touch ID) and tap it. You’ll be asked to enter your existing passcode. Once you’ve done so, scroll the resulting screen down and tap on Change Passcode. Once again, you’re asked to enter your old (existing) passcode. On the screen where you will enter a new passcode, tap the blue link for Passcode Options.
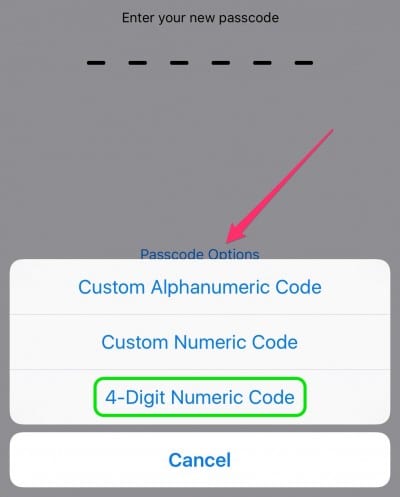
Those options are a custom alphanumeric (letters and numbers) code, a custom numeric code (6-digit passcode), or a 4-digit numeric code (the old standard). Select the latter with a tap, then enter and confirm the 4-digit code you’ll be using in the future.
5.) Speed up iOS 9 on older iPhones
Many of these tips are designed to take a few seconds off of each session you spend interacting with your iPhone. But what if your iPhone is an older model and iOS 9 is generally slow? Here are a few ideas that you can try to make your “vintage” iPhone run a bit faster.
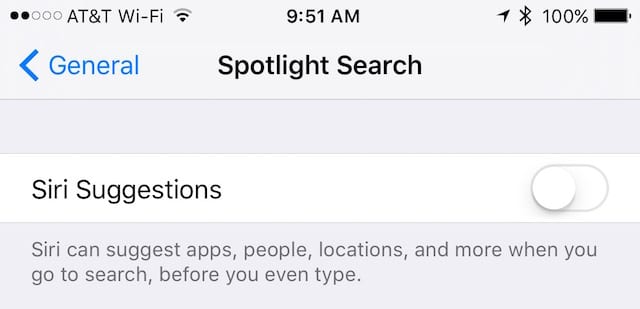
First, try disabling Siri Suggestions. That’s a feature in iOS 9 that is extremely helpful, but it also requires the device to constantly be collecting data like location or friends you frequently message. Every bit of processing power being used to collect and process that data slows down your older iPhone. To disable Siri Suggestions, launch Settings, tap General, tap Spotlight Search, then tap on Siri Suggestions to disable the feature (the button is white when it’s disabled).
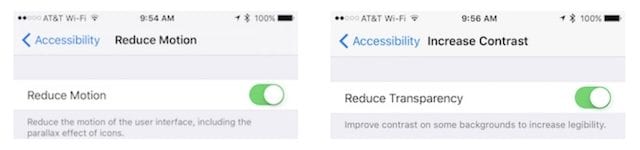
Next, disable motion and transparency. Both of these are visual functions that look great, but unfortunately have the side effect of slowing you down when changing screens. To reduce motion, launch Settings, tap General, tap Accessibility, scroll down to Reduce Motion, and tap the button to turn on the feature (the button is green when it is enabled). Reducing transparency increases screen contrast, and also speeds up changing between one screen and another. Once again, launch Settings, tap General, tap Accessibility, scroll down to Increase Contrast and tap it, then turn on Reduce Transparency. While you might not expect changing these two settings to make a difference, you’d be wrong in that assumption.
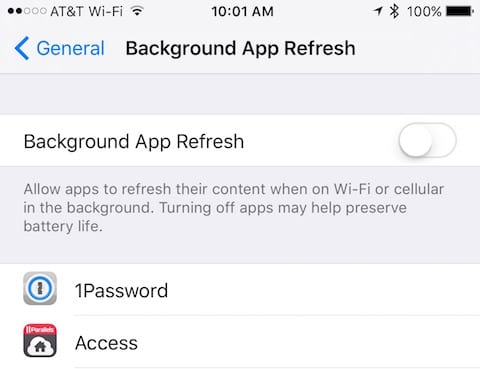
Finally, a lot of our iOS 9 apps grab information online all the time. Background App Refresh is designed to constantly update the information so that you can have the latest information at your fingertips all the time. This has the effect of not only using a lot of your expensive data plan while you’re out and about, but also subtly slowing down other processing on your iPhone. Turning off this function, you might notice a slight delay when opening some apps as they will need to refresh data at launch, but it’s usually almost unnoticeable. To turn off Background App Refresh, launch Settings, tap General, tap on Background App Refresh, then tap the button to turn off the feature (the button is white when it is disabled). Note that you can also choose to turn off Background App Refresh for selected apps and not all apps if you so desire.
Those are our speed-increasing tips for the week. Do you have any tips you’d like to pass along to readers of The Rocket Yard? If so, let us know in the comments.