


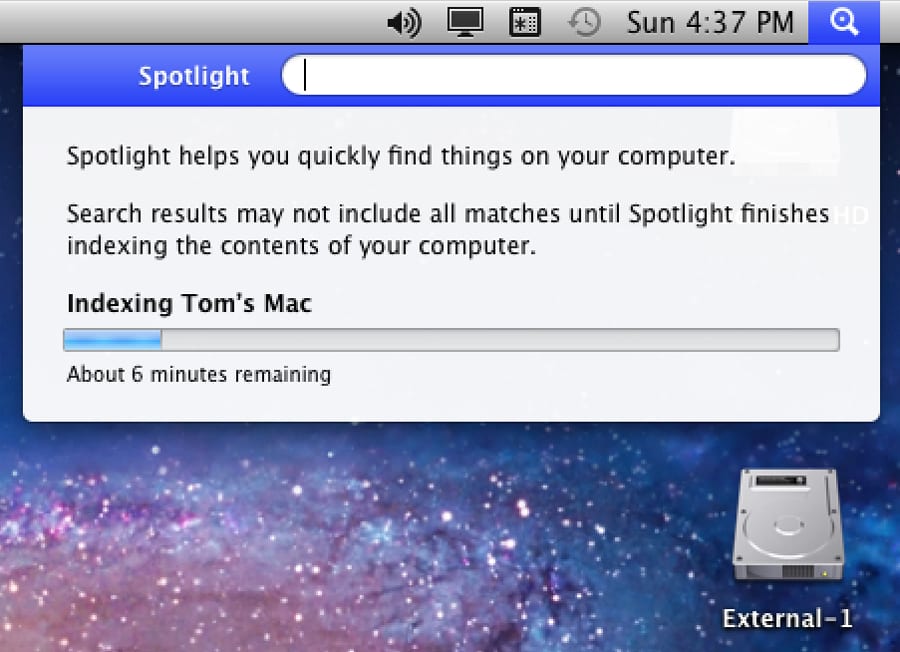
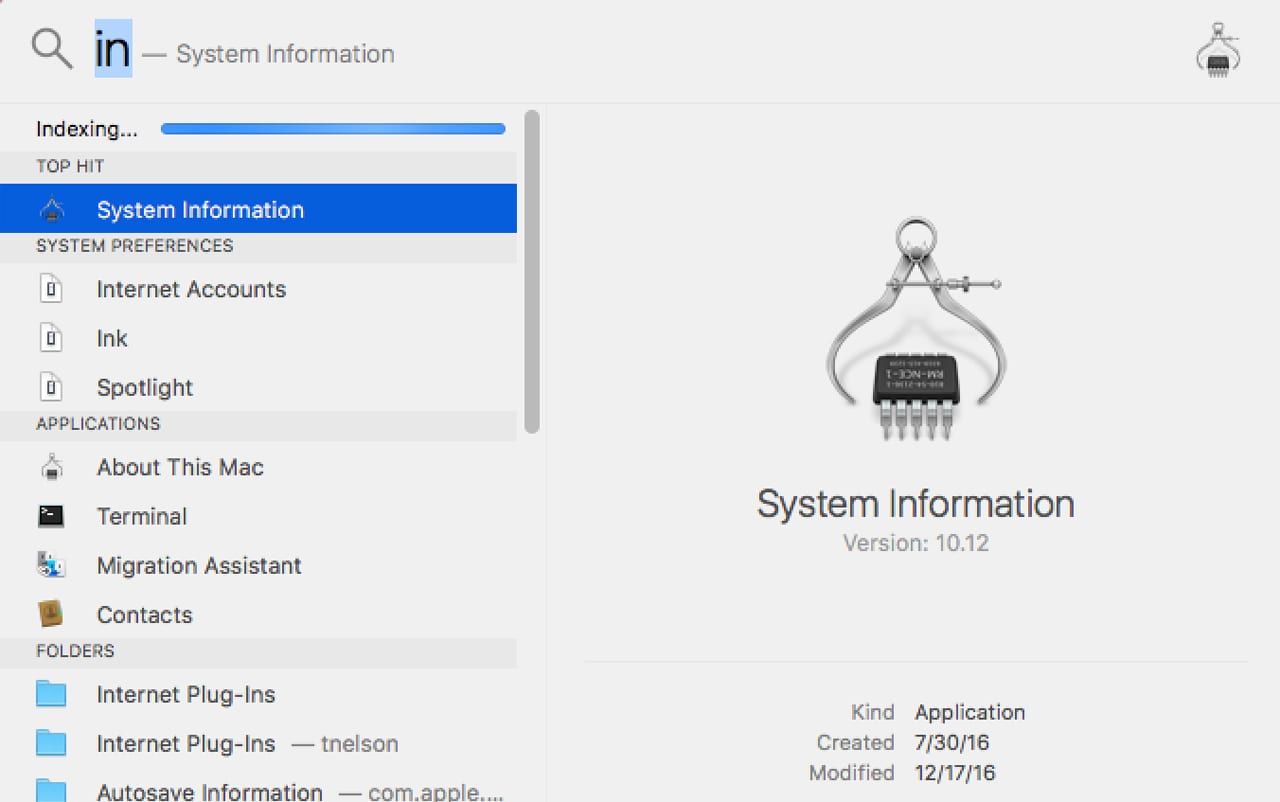
Spotlight, the Mac’s primary search tool, was introduced with OS X Tiger. As most original versions do, Spotlight lacked a few features and had some minor issues, but for the most part, it just seemed to work.
One issue that did come up a few times involved indexing, which is the process that Spotlight uses to build information about the contents of a specific volume mounted on your Mac. The indexing process that creates the metadata file that Spotlight uses can be long, and has been known to place a heavy load on a Mac’s resources, primarily CPU load.
The result of the heavy CPU load was a feeling of sluggishness as you performed other activities on your Mac, such as visiting websites or receiving email, but mostly while working in resource-intensive apps, such as those designed for multimedia.
With each release of the Mac OS, Spotlight’s features got better and better, but the indexing issues seemed to remain. For the most part, if you were aware of the Spotlight indexing process, it was simple enough to just wait the task out. After all, the indexing normally only causes an issue when a volume is initially indexed. Subsequent updates to metadata files for the volume are quick, and for the most part, are hardly noticeable.
Spotlight Indexing Issues
Sometimes you just can’t wait on the Spotlight indexing process, especially if the project you’re working on has a fast-approaching deadline. Other times, when you have plenty of time on your hands, you may notice that indexing never seems to finish. While indexing does take a bit of time, and the length of time needed is dependent on the amount of data stored on the volume, indexing shouldn’t take days or even hours.
Nevertheless, there are times when you don’t want to wait for the initial indexing to finish; luckily, you have a few options you can use to control indexing.
Disabling Spotlight Indexing
There are two primary ways to control Spotlight indexing: using the Spotlight preference pane, and directly manipulating the metadata utility used by Spotlight. We’ll tackle the Spotlight preference pane first.
Control Indexing With the Spotlight Preference Pane
You may have noticed that the Spotlight preference pane has no on or off switch, but it does have a Privacy tab, which can perform a function that’s similar to turning Spotlight off.
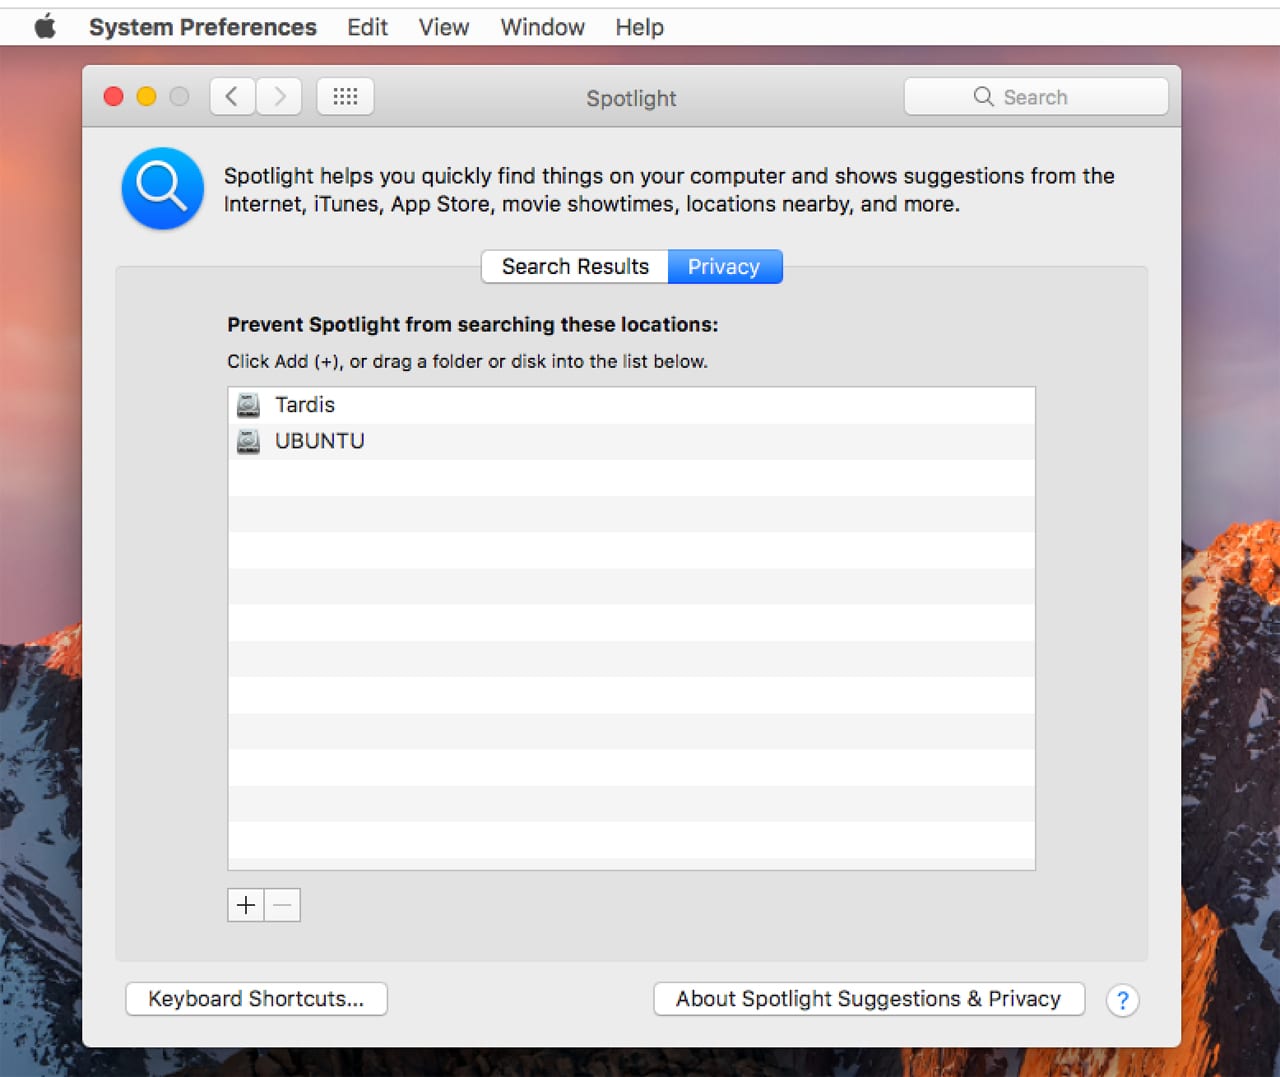
Launch System Preferences, and then select the Spotlight preference pane.
Select the Privacy tab.
The Privacy tab holds a list of volumes and folders that have had indexing turned off. Add a volume to the list, and the indexing process is turned off; no new indexing is performed for that volume.
To add a volume (or folder), click the Add (+) button, and then select the volume or folder to be added from the standard Choose dialog box.
You can turn indexing back on for any volume or folder in the Privacy list by selecting the volume and using the Remove (-) button. Once removed from the Privacy list, indexing will start for the item you selected.
Control Indexing with Terminal
The Terminal app, located at /Applications/Utilities, offers a number of commands specific to Spotlight, including mdutil, a utility for managing the Spotlight index function. The mdutil utility manages the metadata stores used by Spotlight and allows you to turn indexing on or off, erase existing metadata storage files, remove local cache indices of network stores, and a few other useful tasks.
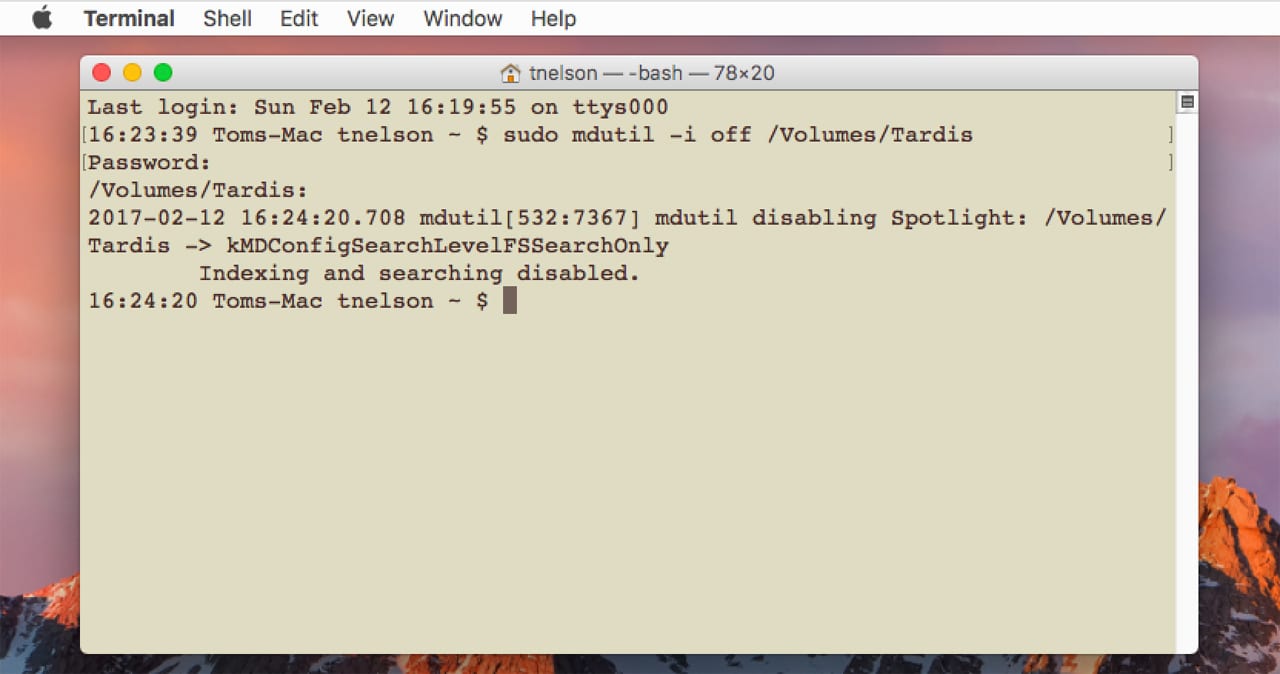
To turn off indexing for a specific volume launch Terminal, and then use the following command:
sudo mdutil -i off /mountPoint
where mountPoint is the path to the volume. For the startup drive, the path would simply be “/” (without the quotes). For other mounted drives on your Mac, the path would likely be /Volumes/volumeName. As an example, if I wanted to turn Spotlight indexing off for my startup drive, the command would be:
sudo mdutil -i off /
If I wanted to turn indexing off for my Time Machine drive, which is named Tardis, the command would be:
sudo mdutil -i off /Volumes/Tardis
After executing the command by pressing enter or return, you may be asked for your administrator password. Enter the password at the prompt, and then hit enter or return.
Tip: Instead of typing out the path to the volume, you can drag the volume into Terminal, and the pathname will be added to the command. For example, if I wanted to turn indexing off for my Tardis volume, I would enter sudo mdutil -I off into Terminal, and then drag the Tardis volume into Terminal. The result would be the completed command of sudo mdutil -i off /Volumes/Tardis.
As you’ve probably guessed, you can turn indexing back on by using the same command and substituting on for off.
Force Spotlight to Re-index a Volume
Every once in a blue moon you may find Spotlight gets stuck indexing a volume. This can take the form of having the indexing function continue for a very long time, with no end in sight.
The usual cause for this problem is a corrupt metadata store associated with the volume being indexed. To correct the issue, you can delete the file that stores the metadata. The metadata stores are located in a folder at the root of each volume with an index and are named Spotlight-V100. The name includes a period at the beginning, indicating the folder is invisible and will not normally be displayed in the Finder or Terminal.
Deleting the metadata store can force Spotlight to create a new one, and start the indexing process over again. There are two methods I will show you for forcing the file to be deleted and re-indexing to start.
Re-indexing With Spotlight Preference Pane
An easy way to have Spotlight reindex a volume is to use the Privacy tab in the Spotlight preference pane. Simply add the volume that’s having an indexing issue to the Privacy tab; this will cause indexing to stop. Wait about a minute for all the related Spotlight processes to quit, and then remove the volume from the Privacy tab. This will cause a new index to be created.
Re-indexing With Terminal
The mdutil utility includes a command that will erase the current metadata store file, and then restart the indexing process. This is the method recommended when you’re having problems with indexing not completing, and using the Spotlight preference pane to stop and restart indexing hasn’t fixed the issue.
The command takes the following form:
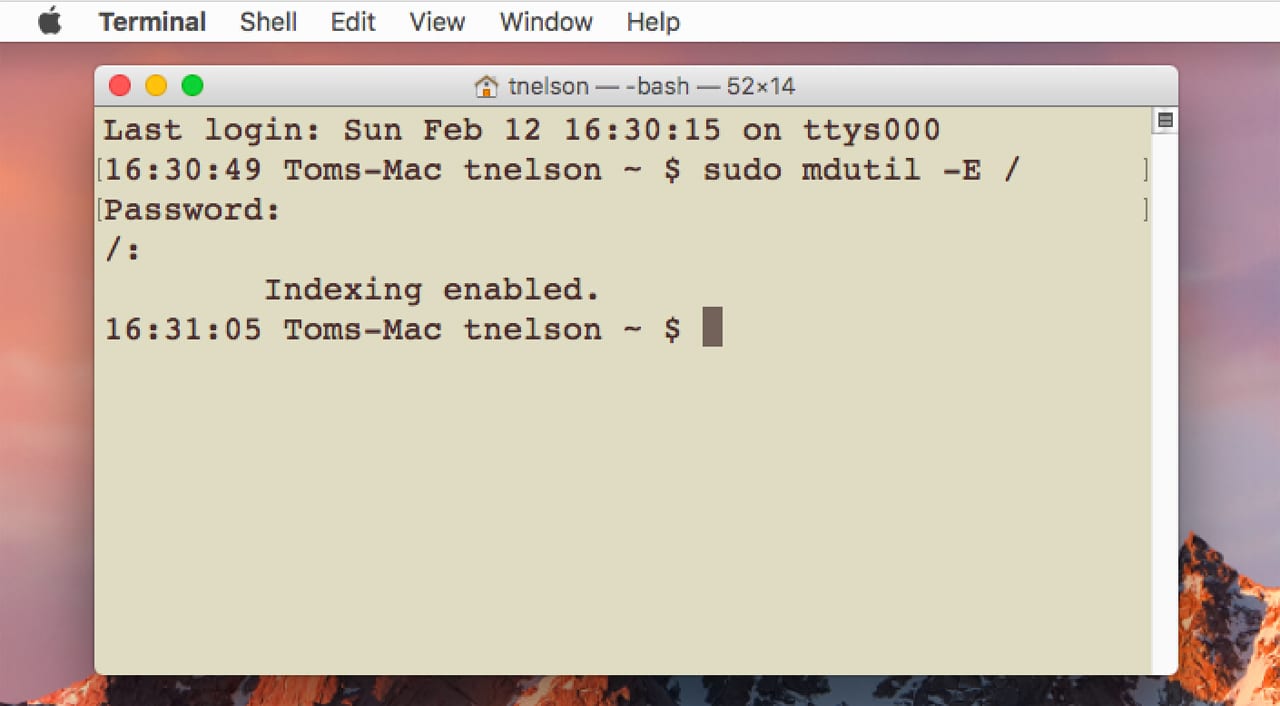
sudo mdutil -E /mountPoint
To force Spotlight to reindex your Mac’s startup drive, the command would be:
sudo mdutil -E /
Reindexing a different volume would look like this:
sudo mdutil -E /Volumes/volumeName
Note: The -E option only deletes the existing metadata store for the selected volume. Reindexing only occurs if the volume’s indexing status was set to on (see mdutil -I options, above). You may also be asked for your administrator password; supply the password at the prompt to allow the command to complete.
You can check the status of a volume by using the command:
sudo mdutil -s /mountPoint
Controlling Spotlight through the Spotlight preference pane, as well as the mdutil command in Terminal, gives you a great deal of control over the Spotlight indexing process. With these tips, you should be able to correct any Spotlight issues involving the metadata stores.
For further information about the mdutil command, check the Apple Developer Library Manual Pages for mdutil.
Be sure to click here for more helpful Rocket Yard Guides!


Very helpful, but how can I set the priority of Spotlight indexing to be very low so it runs in the background and does not slow everything else down excessively? (I have two large rotating disk drives, and indexing takes many tens of minutes.) Thanks
This doesn’t work for me. What am i doing wrong?
Drag and drop to exclude an external drive used for Time Machine gives err message – Can’t do that for Time Machine drive
From Terminal, err message is the same using technique in article.
“mdutil[38250:572426] mdutil disabling spolight: /Volumes/mytime_machine_volume -> kMDConfigSearchLevelFSSearchOnly” then new line
“Indexing enabled. (Indexing level may not be changed on volumes which have a Time Machine backup)”
I just found out that EXIF data viewable in Finder or view information or Preview is available only if spotlight is turned on for the folder containing the file being viewed. What a pain. It seems like if spotlight is off, it should look at the file directly instead of relying on spotlight metadata.
Now I’m having to turn spotlight back on for some folders on eternal drives so I can get this handy feature to work.
Can someone please tell me why searching for a file on a network volume has been so comparatively slow since 10.6? Snow Leopard seems to be the last version of the OS that got this task right. My very old macs running 10.6 find file on their network server in an instant. My newer macs do not. It takes minutes. Why is this?
Consider using the free “easyfind” app. Free and great at searching remote volumes. It doesn’t search metadata though.
Maybe this doesn’t help so perhaps this little link will spark a few ideas, “Enabling Spotlight For Network Volumes” krypted.com/mac-security/enabling-spotlight-for-network-volumes/
Great article. Very useful
Great Blog. I learn every day something new. I hope you leave old blogs running, as I go back and check things again and again.
Thanks
Karl
Hi, Karl. We certainly keep all of our blog articles live. You can find our entire archive here: https://blog.macsales.com/site-archives Thanks for reading!
You can also add an item to Spotlight’s Privacy tab simply by dragging it from the Finder into the space in that pane.
How about using `nice` to lower its indexing process priority?