

[Update 01/31/18: macOS Server Will Lose Many Services this Spring: Here Are Alternatives]
[Update] Find the entire macOS Server series here!
This is the fifth in the ongoing Rocket Yard series describing how to use Apple’s macOS Server to provide services to users both inside a local network and over the Internet.
Previous articles include:
- Part 1: Background and Setup
- Part 2: Serving a Small Business
- Part 3: Router Configuration and Open Directory
- Part 4: Setting Up File Sharing and Wikis
Over the past four articles, we’ve discussed why you’d want to run your own server for personal reasons or for a small business, talked about setting up a used Mac mini from MacSales.com as a server, and described how to set up macOS Server to provide a group of users with file sharing and wiki services.
This week, we’ll look at two of the more important services for any workgroup that’s using the macOS Server: mail and calendar services.
Setting Up Mail Services
First, we need to make sure that we set up mail exchange (MX) records with our DNS host (by the way, your server can be your own DNS server…but we haven’t covered that topic, so we’re assuming that you have a hosting provider acting as the DNS host for your domain).
Earlier in this series, we set up a DNS record for our example company — mail.astoundingphotos.com — that pointed to our server’s IP address. That’s not all we need to do, though. Mail servers require that a mail exchange or MX record be set up as well as a DNS “A” record. The “mail.astoundingphotos.com” record that I set up earlier is an A record.
So what we need to do is add our MX record, which is of type MX and has a format like “XX mailserver.domain.com.” where XX is a priority number (we’ll use a high priority, 10), and the fully qualified domain name, which in our example will be mail.astoundingphotos.com.
Once the MX record has been created, our non-editable DNS record listing looks something like this (note that I am using DreamHost to provide the DNS services for the example domain):

Now it’s time to configure the Mail service on macOS Server. On the dashboard, go to the Services section of the left sidebar and click on Mail. Initially, the screen looks like this (see screenshot below):
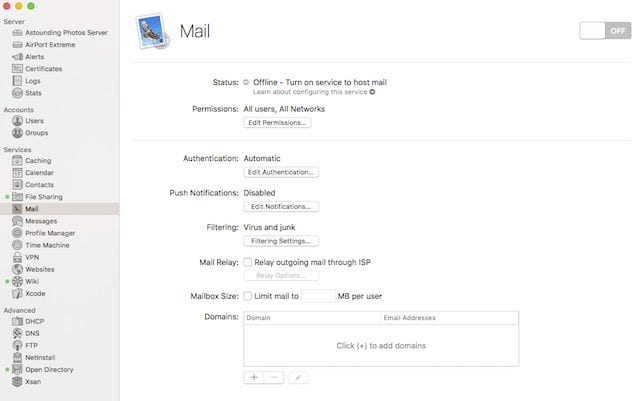
Go all the way down to the bottom of this page where you’ll see the word Domains. This is where it is possible to add one or more domains for email. In our example, we’ll only add the mail.astoundingphotos.com domain, but we could also add other domains. Click the plus sign ( + ) and the following dialog appears (see screenshot below):
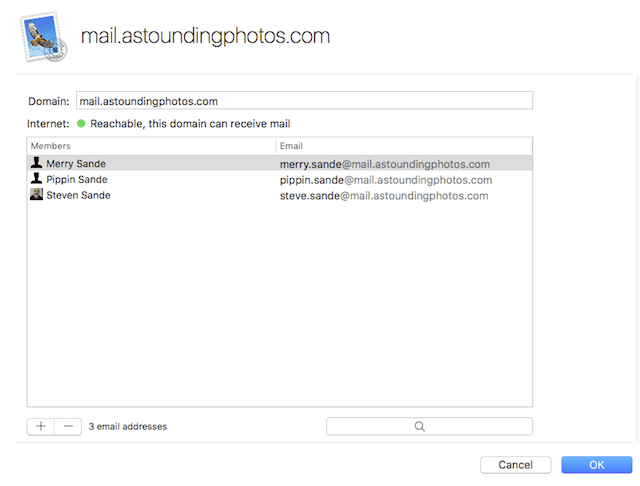
Type in the domain name (in this case, mail.astoundingphotos.com) and then start adding members to the list. By default, the short names of our users are used as the email addresses. For example, one of my “employees” (actually my cat), Merry Sande has a short name of merrysande and her default email address would be merrysande@astoundingphotos.com.
This can be changed — for example, if I preferred to have email addresses in the format firstname.lastname@domain.com, I could click on the email address and add the “dot” between merry and sande. As you can see in the preceding screenshot, I’ve added all three of my current users to the mail list, and can now click “Create” to create the email accounts.
There are several other things we can do prior to turning on the Mail service. First, we can choose different authentication methods — Automatic, Open Directory, Active Directory (in a Windows server environment), Local Users, or Custom. For the purpose of this example, we’ll select the default — Automatic.
Next, we can choose whether or not to set up Push Notifications for users. This will notify users through notification center on iOS and macOS when new email messages arrive. To do this, your organization must have a corporate Apple ID. Since I still don’t have a working email address for that “company”, I will turn this on later after the mail server is up and running.
The next setting is for the sanity of you and your workgroup — Virus and Junk filtering. Clicking the settings button brings up this dialog (see screenshot below):
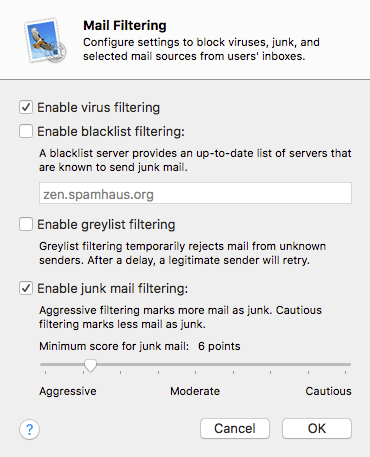
By default, the Mail service is set up to check all mail for viruses and malware, as well as do “aggressive junk mail filtering”. It’s also possible to enable blacklist filtering, which connects to blacklist servers that have a list of servers that are known to send out junk mail. Finally, there’s a checkbox for enabling greylist filtering. With this setting, mail from unknown senders will be rejected with the expectation that a legitimate sender will re-send the message, at which time it will be passed through to the recipient.
Your internet service provider may require that any mail be relayed through their servers. If this is the case, the Mail Relay checkbox should be checked and the ISP’s server address inserted in the proper field. You may also need to provide authentication details for the relay server.
Finally, you have a decision to make for your users; do you give them unlimited space in their mailboxes, or do you limit them to a specific size for each mailbox? Keeping the Mailbox Size checkbox unchecked will let each user have unlimited space. You might need to keep on your server users to try to delete emails, or get larger and more expandable storage.
When all of the settings are set to your liking, you can click the “On” switch in the upper right-hand corner of the Mail pane. Note that you’ll be asked whether you wish to allow access to Mail from the Internet — since most people expect to get to their email from anywhere these days, you should allow access. This will configure an attached AirPort Base Station to open the TCP/IP and UDP ports associated with email, and may restart your AirPort Base Station in the process.
Upon starting the Mail service, the macOS Server app downloads virus definitions. This process can take a while depending on the speed of your Internet connection and local network.
Connecting to the Mail Server from iOS
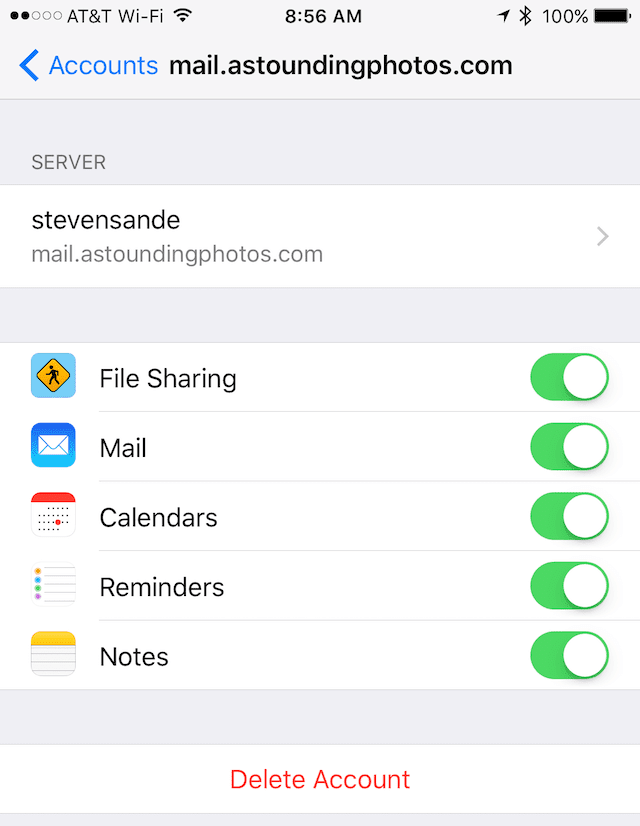
In the fourth part of this series, we discussed how to connect to the server from iOS. Now if you go into Settings > Mail > Accounts and tap on the server name, two new services automatically appear — Mail and Notes. Tap on each button to give the iOS device access to the services, then tap Save. In the screenshot below, you can see that the services can be turned on or of with a tap (note that this shows Calendars and Reminders…which we will add in the next section):
In your list of Mailboxes in the iOS Mail app, you’ll now find a mailbox for the server account. I always suggest testing the new mailbox by sending an email to each account, then asking the recipients to reply to that email.
Connecting to the Mail Server from macOS
Connecting to Mail from macOS is quite simple as well. Launch System Preferences, scroll down to “Add Other Account”, and then add Mail Account. With my test server, I found that adding the Mail account separately worked more consistently. You’ll just need to enter a name, the email account on your server, and the password associated with that account.
Once you’ve connected, the mail account appears under your list of Mailboxes.
Extra Bonus Service: Notes
By enabling the Mail service on your macOS Server, you got an extra bonus service — Notes! Users can now select the server as a host for Notes in addition to iCloud or storing them on the local device. No other configuration is needed.
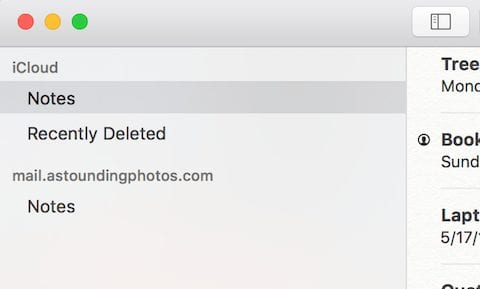
Under the Notes “folders” you’ll find a listing for the server (see screenshot above). Tap, make a change or a new note, and it is automatically updated through the server to all other devices connected to the same account.
Setting Up the Calendar Service
The Calendar service on macOS Server can be one of the most useful services you set up. Not only can your users keep their personal and business calendars stored on the server, but it’s also possible to reserve resources.
What’s a resource? Well, let’s say that your company has a couple of conference rooms, a few projectors, maybe a loaner MacBook Pro or two. Each of those is either a location (the conference rooms) or a physical “thing” (projectors and MacBook Pro), so you can actually reserve those items on the calendar. It’s a great way of managing those resources so that they’re not double-booked by employees.
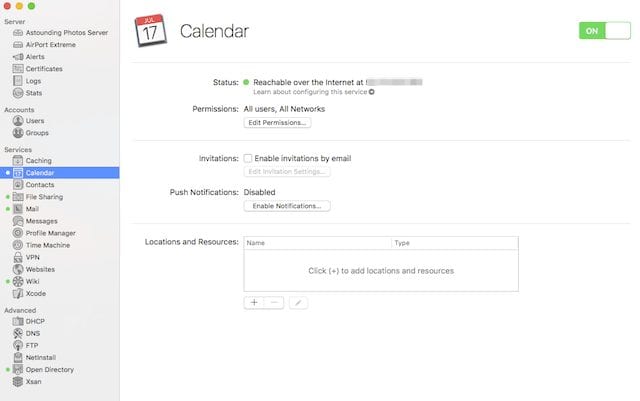
To begin configuring the Calendar service, click on the Calendar icon in the Sidebar under Services. There are just a few items that we need to set up, but let’s turn on the service first. As with the other services, just click the “On” button in the upper right corner of the server dashboard so that it turns green. You’ll be asked whether you wish to allow access to Calendar from the Internet — once again, since most users will want access to their calendar service from anywhere, it’s wise to click Allow (see screenshot below).
First, we can have the server send out invitations and receive responses by checking the “Enable invitations by email” box.
Doing that brings up a dialog that asks for an email address for the server. For our example, choose the suggested address: com.apple.calendarserver@mail.astoundingphotos.com. Configuring the server email address requires selecting a server type for both incoming and outgoing email (IMAP recommended), knowing the mail server name, and having a user name and password that can be associated with the account (for this example, we used one of the admin accounts).
As before, it’s possible to enable push notifications provided we have an Apple ID for our organization. Finally we can add resources. In this example, we’ll add a projector and a location — a conference room. To add those resources, click the now-familiar plus sign ( + ) button below the Locations and Resources section of the Calendar pane.
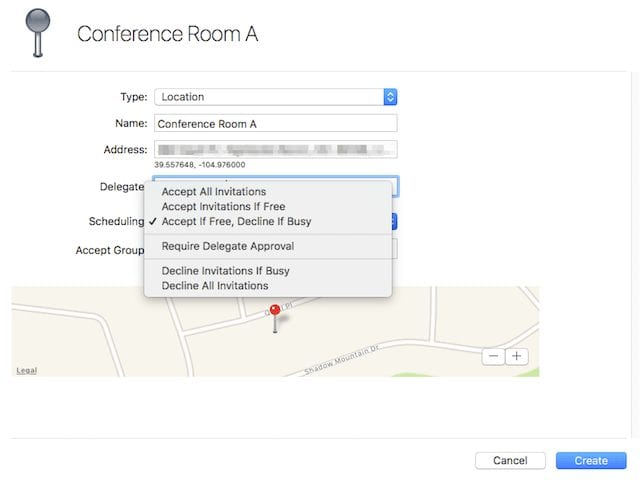
To add a location, provide a name for it (“Conference Room A”), add an address (this is done so that Calendar can help determine directions to and from the location), add a delegate (a person who can view and manage resources), and select the type of automatic or manual scheduling desired. The choices can be seen in the screenshot below:
Adding the projector is done the same way, except that resource does not include a location. To finish adding a resource, click the Create button.
To use the Calendar service in either iOS or macOS, we just need to go through the now-familiar process of enabling the service in Settings > Mail > Accounts > Server Name (iOS) or in Internet accounts in macOS. Note that you can choose to add the Calendar services to your Mac as a CalDAV account; I found that worked well.
Once completed, the resources can be selected while setting up a new appointment in calendar. The “location” displays a list of location resources — typing in “Conf…” auto populates the field with choices for your conference rooms. Physical resources like the project are “invited” to the meeting under the “Add invitees” section of an appointment. To make sure that the conference room and projector are both available during the meeting time, just click “Check Availability” on the appointment (see screenshot below):

If there’s a conflict, click on “Next available time” and the Calendar server selects the first time that the attendees, locations, and other resources are free for a meeting.
Extra Bonus Service: Reminders
Just as adding the Mail service gave us the Notes service as a bonus, adding the Calendar service gives us Reminders. The service shows up in the list of services provided by the connected server, and if it isn’t enabled, tapping the button (on iOS) enables it immediately. Likewise, it shows up on the macOS Reminders app sidebar once we’re connected to the server.
In our next article, we’ll add the Time Machine service for local users, as well as the Contacts service…and perhaps more. Any questions or comments? Leave them in the comments section below.


How buggy and prone to operator mistake is this? Can one really use this in daily company operations?
About 4 years ago I bought OS X Server but after a few months I gave up on it. I didn’t have the right hardware and it was over kill for my interest at that time. Now i just changed from Cox cable to Verizon Fios and I’m interested again. I liked the internet i had with cox but with Verizon things are faster & very different and I feel less secure on line.
This series is very helpful – however the length constraints of a blog make it difficult to put in all the details which are necessary to demystify things. I suggest what is needed is a “Missing Manual” for Apple Server.
Perhaps you could give that a thought. Thanks.
Hello,
I’m a totally blind Mac user, interested in setting up Mac OS Sierra Server, as I’m a hobbyist, Mac enthusiast, and enjoy messing around with this stuff.
I’ve really been enjoying reading this blog, and am looking forward to the next post in the series!
Keep up the great work! Macs rule!
Ron J.