

![]() macOS Mojave has a lot going for it: plenty of new features, new security and privacy safeguards, even new apps, such as News and Home. Even with all the new capabilities, some of you may find yourselves wishing for one of the previous versions of the Mac operating system.
macOS Mojave has a lot going for it: plenty of new features, new security and privacy safeguards, even new apps, such as News and Home. Even with all the new capabilities, some of you may find yourselves wishing for one of the previous versions of the Mac operating system.
Perhaps Mojave is performing poorly on your system, even after trying some of the tips in: Is Mojave Slowing Your Mac Down? This is How You Can Speed It Up. Or maybe a favorite or mission-critical app hasn’t been updated yet for Mojave, and you need to downgrade the OS to be able to keep running an older app.
No matter the reason, you can downgrade from macOS 10.14 and revert to an earlier version by following the steps below.
How to Downgrade From macOS Mojave
The downgrade process begins with backing up your current system. This is to ensure that, should something go wrong during the downgrade process, you can recover your data and be back where you started. You’ll also need the backup because the downgrade process includes erasing your Mac’s startup drive. If you need to restore some of your documents and files to your Mac after you downgrade, the backup may be your only place to find them. To make accessing those backup files as easy as possible, I recommend creating a clone of your startup drive. It’s also possible to use Time Machine, but no matter which method you use, be sure you have a backup before proceeding.
Before we start the downgrade process, consider these alternatives:
- If you’re downgrading because you need a specific app that doesn’t run well under Mojave, you may be able to install an older version of the macOS on a separate drive or partition. This will allow you to keep Mojave and switch between the OS versions as needed.
- Another alternative is to use a virtualization app, such as Parallels, to run an earlier version of the macOS in. Once again, this will let you run earlier apps that you may need without having to go through the downgrade process.
If you decide that downgrading is what you need to do, we’re going to show you three basic ways to accomplish the task:
- Use a downloaded Mac OS installer for the Mac version you wish to revert to.
- Use Time Machine to revert to an older version of the OS.
- Use Apple’s recovery service to reinstall the original version of the Mac OS that shipped with your Mac.
The method you choose is up to you, based on your needs and the availability of an installer for the operating system you wish to return to.
Mac Operating System Installers
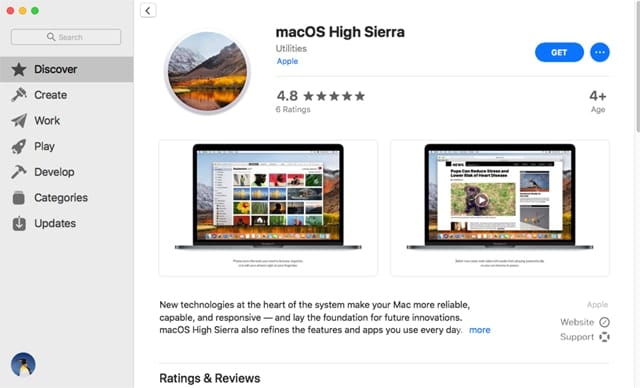
Downgrading to macOS High Sierra is one of the easier choices since the installer app is still available in Mojave’s Mac App Store. It’s also available using the direct link: itunes.apple.com/us/app/macos-high-sierra/id1246284741?mt=12
If you wish to go back to an even earlier version of the OS, you’ll need to have downloaded the installer before you upgraded to Mojave, or be able to access a Mac running an earlier version of the operating system, and then log in to the Mac App Store and download the needed installer using the store’s Purchased tab.
Once the installer finishes downloading, be sure to quit the installer, which may start automatically.
With the installer downloaded, you need to make a bootable copy of the installer on a USB flash drive or other bootable media. You can use the DiskMaker X app, and follow the instructions in Create a Bootable macOS High Sierra Install Drive with DiskMaker X.
APFS Issues When Downgrading
Mojave upgrades the startup drive to APFS, the new Apple File System. APFS is currently only fully supported on all media types in Mojave. High Sierra can support APFS on SSDs, but not Fusion or hard drives. Sierra has experimental support for APFS, though it may not be a good idea to try to use APFS with Sierra.
The reason we brought up APFS is that when you downgrade, it may be a good idea to convert your startup drive back to HFS+ to ensure compatibility during the install process. Converting to HFS+ will completely erase the startup drive.
Use Internet Recovery to Downgrade
We’re going to use Apple’s Internet Recovery system to erase and reformat the APFS startup drive to an HFS+ formatted drive. While it’s possible to use the normal Recovery volume as long as it’s located on a different volume than your startup drive, it’s a lot easier just to use Internet Recovery, and not worry about the location or the version of the Recovery volume
Erase and Reformat the Startup Drive
Warning: This process will completely erase your Mac’s startup drive.
This section covers the basics of erasing and reformatting the startup drive, and will be used in some form for all the reinstall methods this article covers. An Internet connection is required.
Shut down your Mac.
Start your Mac while holding down the Option + Command + R keys. Continue to hold the three key combination until you see the spinning world globe, along with the text “Internet Recovery.”
In the macOS Utilities window, select Disk Utility, then click or tap the Continue button.
In the Disk Utility window, select Show All Devices from the View menu, or the View button on the toolbar.
In the sidebar, select the startup drive (not the volume or container).
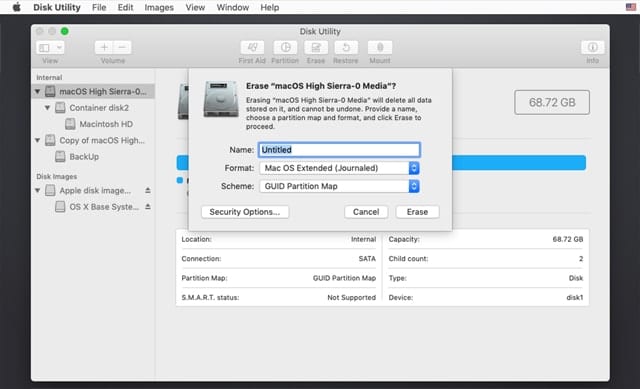
Click or tap the Erase button in the toolbar.
In the sheet that drops down, select Mac OS Extended (Journaled) as the Format option, and GUID Partition Map as the Scheme.
Click or tap the Erase button.
Quit Disk Utility.
Install an Earlier Version of the Mac OS
Perform all the steps in the “Erase and Reformat the Startup Drive” section, above, and then continue from here.
Make sure the bootable installer you made earlier is connected to your Mac.
Restart the Mac while holding down the option key.
The boot manager will display a list of drives you can start up from. Select the bootable installer you created earlier.
It may take a while to boot, but eventually, the installer will start and walk you through the installation process for the version of the Mac operating system you’re downgrading to.
Alternative: Downgrade Using Time Machine
It’s possible to use Time Machine to restore your Mac to the OS it was running before you upgraded to macOS Mojave. For this method to work, you must have a Time Machine backup that was made before you upgraded to Mojave.
Warning: Restoring from Time Machine will erase the contents of your Mac’s startup drive.
Follow the instructions in the “Erase and Reformat the Startup Drive” section, above. After you quit Disk Utility, pick up the steps starting here:
Make sure your Time Machine drive is connected to your Mac.
In the macOS Utilities window that opens, select the “Restore From Time Machine Backup” option, then click or tap the Continue button.
The Restore from Time Machine window will open with a few warning messages. Click or tap the Continue button to proceed.
A list of available restore sources will be listed. Select the drive you use for your Time Machine backups, then click or tap the Continue button.
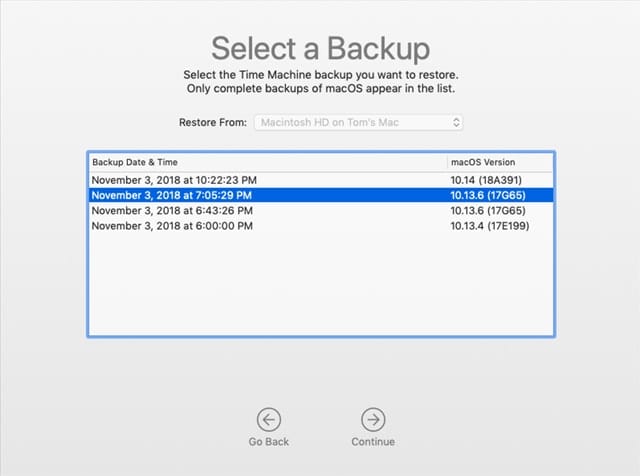
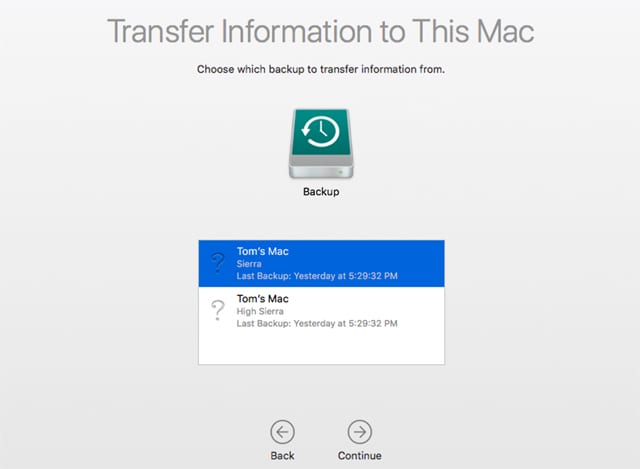
Time Machine System Restore will list restore points available to you to use. Each restore point will include the version of the Mac OS that was present when the backup occurred. Select a restore point that includes the version of the Mac OS you wish to downgrade to. Click or tap the Continue button.
A list of connected drives will appear. Select the drive you wish to use as the destination for the Time Machine restore. This should be your startup drive, which you erased in a previous step. Click or tap the Restore button.
The restore process will begin. Once it completes, you’ll need to restart your Mac.
Alternative: Downgrade to Mac OS Version Originally Included with Your Mac
Ever since macOS Sierra 10.12.4, the Recovery volume has had a secret. It’s possible to use the Recovery volume to reinstall the version of the Mac OS that shipped originally with your Mac.
Note: Apple includes a disclaimer that the original version of the OS for your Mac may not be available, in which case the OS downloaded will be the next closest one that is still available.
The advantage is that you don’t need to download or create a bootable installer. The disadvantage is the OS that originally shipped may not be the one you wish to use. But if you were unable to download the installer you wanted, this may be an option for downgrading.

Warning: This process will erase your startup drive.
Follow the steps outlined in the “Erase and Reformat the Startup Drive” section, above. Ignore the step that asks you to start your Mac while holding down the Option + Command + R keys, and instead start your Mac while holding down Shift + Option + Command + R.
Once your Mac starts up using Internet Recovery, follow the remaining steps in the section. Once you quit Disk Utility, proceed from here:
In the macOS Utilities window, select the Reinstall macOS option, then click or tap the Continue button.
After a bit of time, the installer for the Mac OS will appear; follow the onscreen instructions to complete the installation.
What’s Next?
No matter which method you used to reinstall the earlier version of the Mac OS, you’ll find you have ended up with a clean install and will likely need to configure the OS to meet your needs. You may also need to restore one or more files from a backup. Search the Rocket Yard blog for more quick answers to your questions.


Can we all just agree Mac sucks now and is going the way of making the most expensive Facebook machines on the planet? I run into problem after problem trying to do anything that requires graphics power (3D VR Gaming). Apples lack of care for graphic professionals these days is unbelievable.
Thanks for this. What a shame this is even necessary, just because Apple won’t approve NVIDIA web drivers for Mojave. Refer: https://en.wikipedia.org/wiki/Nvidia#Apple/NVIDIA_web_driver_controversy
Is it possible to downgrade to High Sierra if your Mac came with Mojave pre-install?
Very informative! I was able to downgrade from a Time Machine backup, but now the security updates fail each time I run them. Is there a set of steps I need to follow to get these to work?
My mac is already running Mojave. Could I add the new volume with diskUtilities (without erasing the full drive) and recover from TimeMachine the HighSierra backup INTO this new volume? Wouldn’t this create a double-boot possibility without erasing existing Mojave? Jacek.
Great Article. I got rid of Mojave which was slow as heck and installed High Sierra. Night and day difference on my 2013 MacBook. The newest version of DiskMaker wouldn’t do it but the High Sierra version did. Thank you for saving my laptop!
thank you… spent hours trying to figure out how to get internet recovery to load yosemite (what it shipped with) i had done this before but it was that long ago I forgot, thanks again, legend!
“You may also need to restore one or more files from a backup.”
Ouch. That one sentence glosses over about 90% of the pain of the downgrade process. Installing a clean OS is cookbook. Migrating your files back down to it is excruciating.
I am a little worried about this part…
it seems real complicated to go back to 10.13 now I have Mohave. the only reason is I made a book in Pages and Mohave changed pages, so I lost the file. the restore sofware out there wants a big chunk of money to restore a file. when I get over my mad, I’ll decide what to do. the other reason I don’t like Mohave the messenger gets a spinning ball on it. it’s annoying. I don’t trust updates anymore. period.
Considering this because the removal of subpixel antialiasing at mojave, replaced by a font weight blurry technic
I never under any circumstance upgrade anymore.
Waiting for DiskWarrior 6 with full support to rebuild APFS disk directory to upgrade from macOS 10.12 Sierra to macOS 10.14 Mojave or whatever next.
Take care with an OS reinstall. My upgrade to macOS 10.13.6 was a disaster, with runaway processes eating up almost all my CPU. Fortunately, I still had 10.13.5 on my SuperDuper backup, so I restored from that. There was only one hitch. My CS3 version of Photoshop demanded a new install code and Adobe’s process for doing that was so fraught with problems, it seemed deliberately intended to brick it. You make have similar issues with apps that have install codes.
Is it possible to run older versions of Mac OS on the 2018 Mac Mini?
Generally speaking, you can’t run an OS that is older than the version that originally shipped with the Mac. The reason has to do with older versions of the OS not including the needed drivers or other support files needed by the newer hardware.
There are sometimes exceptions, but I would not expect the 2018 Mac mini to be able to run a previous OS just because most of the hardware is new.
You could, of course, run an earlier version of the OS from within a virtual environment as mentioned in the article.
Tom
I’ve a question Tom.
I’ve got a MacPro -2013 model Trashcan, w/32gb Ram- still on Sierra.
And my 2011-17” MacBook Pro I’m keeping on OS 10.9.5.
If I update the MacPro to Mojave will that cause big probems networking or sharing files between the two machines?
No, flat out. I’ve done the experiment (from an external boot drive), in hopes I would be able to continue to run the version of Apple Server that didn’t have its Calendar Server lobotomized out. Complete failure.