

This is the first article in a five-part series designed to offer you some guidance should you decide to join the community of millions who have discovered the joy of recording at home. Whether you are a beginner who has never recorded before, or if you are more advanced with years of experience, I hope you find value in this series. If you have any questions or would like me to cover a specific topic, please drop a comment at the end of the article. I read them all and will respond!
A (very) Brief History of How We Got Here
For most of the 20th century, legendary spots like Abbey Road (London) and Capitol Studios (Los Angeles) were the trusted facilities where major record labels knew they could achieve the quality recordings they desired. As the digital revolution gained momentum in the 90s and began transforming all aspects of society, the music industry was also not immune to change.
Fun fact: Pro Tools, the industry standard in digital audio workstation software, was born out of a product called Sound Tools. Sound Tools was first released in 1989, and was dubbed the world’s first “tapeless recording studio.” It would go on to get a rebranding as Pro Tools I in 1991.
In 1999, Digidesign released the Digi 001 audio interface alongside Pro Tools LE; its attempt in making Pro Tools accessible to independent smaller studios and musicians. For the first time, Pro Tools was within reach for those who didn’t have the budget to record in larger recording facilities.
Here we are 20 years later. The professional and hobbyist market surrounding audio production has achieved remarkable growth and it is now easier than ever to produce high-quality recordings out of your basement, home office, or bedroom. If you are just starting out, I know that it can feel overwhelming with virtually endless options to consider, so if you’re not sure where to begin, have no fear! This is the guide for you!
Putting Together Your Home Studio Setup
As I mentioned above, there are many components to consider when putting together your first home studio. From your choice of computer to headphones to acoustic treatments, it can be hard to know how to maximize your budget. If this is your first foray into recording at home, it’s best to keep it simple. As you gain experience, you’ll find that there is a vast market for used gear where you can get upgrades for your studio at a fraction of the price compared to buying new.
Whether you’re starting out in your bedroom or intend to use a spare room in your home, here are a few components you’ll want to consider.
In part one of this series, we’ll cover your computer, digital audio workstation software, audio interface, and microphones. In part two, we’ll get into monitoring, acoustic treatment considerations, and accessories.
Your First Home Studio (Part I)
- Computer
- Digital Audio Workstation Software
- Audio Interface
- Microphones
Your First Home Studio (Part II)
- Headphones
- Speakers / Reference Monitors
- Acoustic Treatments
- Accessories
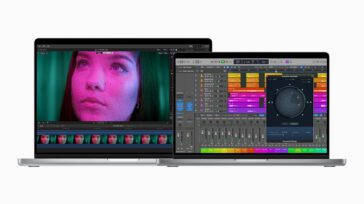
Computer
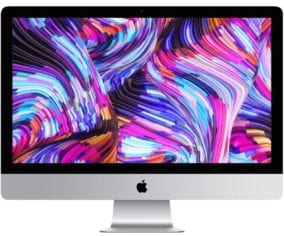
If you’ve never recorded on your own before, I have some great news! There’s a good chance the computer you already have is powerful enough to get you started. You can use a Mac or PC, though Apple computers are considered a standard in the pro audio industry. An Apple computer will also give you more options when it comes time to choose the audio software you’d like to use on a daily basis.
Can I really use the computer I’ve had for years?
In short, absolutely!
If your Mac is 2010 or newer, it’s probably good enough to get you started; 2014 or newer even better. As you get more advanced and start exploring plugins, virtual instruments, and sample libraries, you may discover you could use additional horsepower. If you feel you are regularly hitting a wall and your computer is the culprit, you can decide if it’s better to upgrade your existing system or go with a new purchase altogether. For reference, my personal studio in Brooklyn runs off a 2010 Mac Pro tower and does so very efficiently. These machines are still extremely powerful, and more importantly, super-upgradeable! You can purchase a refurbished Mac Pro tower, upgrade the RAM, install an SSD, and have a beast of a machine that will rival newer iMacs and MacBook Pros. Plus you’ll be able to install additional hard drives for virtual instruments, sample libraries, and more (but we’ll get to that later).
In the interest of practicality and budget considerations, I would recommend starting with whatever computer is already available to you, especially if it’s a Mac that is a 2010 model or newer. If you’re unsure if your computer is going to be powerful enough, drop a comment below with your Mac or PC model and I’ll be happy to offer my two cents for guidance.
Digital Audio Workstation Software (DAW)
So you’ve chosen your computer, now it’s time to select the software you’ll be using to record, arrange, edit, and mix your #1 hit. I will cover the most popular choices in greater detail later in this series, but now is a good time to start thinking about how you intend to work. Here are some questions to consider before you make your decision:
- What types of instrumentation will you be working with?
- Will you be composing? arranging?
- Will you be doing a lot of audio editing of acoustic, organic sounds?
- Will you be collaborating with other producers, artists, studios?
- Are you going to be creating simple recordings or will they be massive arrangements with 20, 30, 40, 100 tracks?
- Are you the type of person who likes to tweak the settings of your software or do you prefer to have major workflow decisions made for you by the software company?
- Do you want to own your software outright or do you prefer to pay monthly via a subscription model?
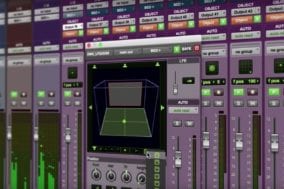
There are many software solutions available, with some of the most popular including Avid Pro Tools, Apple Logic Pro X, Presonus Studio One, and Cockos Reaper. We’ll compare these and others in the third article of this series so stay tuned.
Audio Interface
It’s perhaps the most important piece of gear in your studio. An audio interface is what gives you the capability to get audio into your computer for recording, and out of your computer for playback. Later in this series, I’ll be going in depth to explain all the capabilities today’s interfaces offer. For now just keep in mind that most entry-level audio interfaces offer a host of features including analog-to-digital conversion (recording), digital-to-analog conversion (playback), at least one input for connecting a microphone or instrument, a headphone output, and at least one stereo output for connecting a pair of reference monitors.
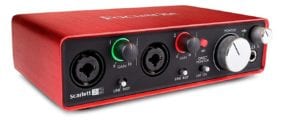
Here are a few budget-friendly audio interfaces that are great if you’re just starting out. They offer good audio quality and features for the price and will let you start making music quickly and easily.
- Focusrite Scarlett 2i2 USB Audio Interface (recommended)
- PreSonus AudioBox USB 96
- Steinberg UR22mkII USB Audio Interface
In the coming weeks, I’ll have an article dedicated to audio interfaces. You’ll learn what separates these entry-level interfaces from the high-end interfaces you’d find in a world-class recording studio.
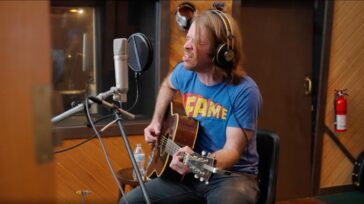
Microphones
Combined with your audio interface, your choice of microphone determines what kind of tone you will capture. Is your source bright? dark? Is it full of transients that will pop with energy? Is it a droning, sustaining sound? There are hundreds of options out there and it can seem daunting if you are a newcomer to recording. While you’re probably not ready to spend $1,000 or more on one microphone, you’ll be happy to know that you can get great quality microphones from trusted brands even if you’re on a tight budget. The most common types of studio microphones can be classified into three categories:
- Dynamics – great for loud, powerful sources like guitar amps and drums
- Condensers – popular for vocals, acoustic instruments, and other sources that generate a full frequency spectrum
- Ribbons – smooth sounding with a darker tone and well-rounded high end – these are less common than dynamics and condensers. They are also considerably more delicate and prone to damage if they are not handled with care.
If you start by adding one dynamic and one condenser to your arsenal, you’ll find yourself well prepared for most scenarios.
Here are a few affordable microphone recommendations for the beginner’s collection:
Dynamic Microphones
- Shure SM-57 (recommended)
- Shure SM-58
- Sennheiser MD421 (for those who want to splurge a little bit)
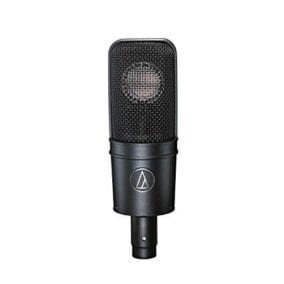
Condenser Microphones
- Audio-Technica AT4040 (recommended)
- Rode NT1-A
- Slate Digital VMS Virtual Microphone System (for those who want to splurge a bit)
- The Slate Digital VMS system uses software modeling to give you recreations of a variety of vintage microphones. While the emulations aren’t perfect, they do provide pretty convincing models of some of the most famous microphones in history.
- DIY Microphone Builds (for the adventurous types!)
- If you happen to be skilled with a soldering iron, you can buy a really inexpensive microphone, get a DIY kit, and convert what would otherwise be a flawed microphone into an exceptionally high-quality microphone for a fraction of the cost. While it’s not a particularly difficult project, I would steer clear unless you are already comfortable with working on electronic components.
So there you have it — if you’ve read this entire article, you’re well on your way to being able to put together your first home studio. Stay tuned for part two of this series where I’ll cover the basics in studio headphones, reference monitors, acoustic treatments, and a few essential accessories.

I recommend the MOTU M2 audio interface. For $10 more than the Scarlett you get audio meters and additional free professional DAW software.
Hi Josh, you sparked my interest in the last section. I have collected a number of somewhat vintage mics from second hand stores. Several are inoperative, but could be dynamite if restored (especially for my harmonica playing). Can you suggest resources for repairs and the kits you mentioned above?
I’m a singer/songwriter. Can never get enough of the basics for audio production. Looking forward to your series. Don’t be afraid to get a little advanced, these are OWC Customers you’re talking to! ;-)
My home studio:
MacBook Pro 2017, 27” Thunderbolt Display
RME Fireface UCX interface
M-Audio Bx5a monitors
ATH-M50x headphones
Shure SM7B mic (plus several others)
Hey Tim,
Thanks for your comment and feedback!
I’ll be getting progressively more advanced with each post. It looks like you have a great home setup. The RME stuff is fantastic, and you already have a couple of other industry standard pieces like the AT headphones and the Shure SM7B.
If you’re looking for microphone repair, it would help to know more specifically which models you have in your arsenal. Some may be capable of being repaired yourself (if you’re adventurous), while you may want to seek out a specialist for something like a ribbon microphone. Would also depend on what is specifically wrong with the non-functioning mics you have. I am more familiar with microphone mod services than repair services, but you might want to start by reaching out to the microphone manufacturers to get their recommendations on repairs.
Here are a few modding sites (some DIY, some service-based) I have experience with:
http://jjaudiomic.com/ (one of the most popular)
http://www.johnbonnellmicmods.com/
https://www.micandmod.com/
https://www.facebook.com/Micrehab/dvancedaudio.ca
-J
Thank you very much! I would like to know if I need a better computer?
I have the following MacBook Pro 5,5 13 inch mid 2009 2.26ghx intel core 2 duo.
I also have a maschine mk3 with komplete kontrol A25.
Also with all these USB connections how can I stop the computer from slowing down? Thanks again A
Hey Ad,
If you’re just getting started, you could first try to do a couple of upgrades to see if you can increase performance. The great thing about your particular MacBook Pro is that it’s very upgradeable.
If you haven’t already, you can upgrade the internal hard drive to an SSD and that will make a huge difference right out of the gate. I think OWC has 500GB drive kits that are compatible with your exact machine for under $100 at https://eshop.macsales.com/shop/ssd/owc/macbook-pro/2008-2009
Next thing would be to upgrade the RAM — the great thing is that these machines actually support up to 16GB of memory. And again for about $85 you can upgrade your machine to 16GB of memory. Here’s a direct link: https://eshop.macsales.com/shop/memory/Apple_MacBook_MacBook_Pro/Upgrade/DDR3
In the end, you can invest about $180 and substantially increase the speed and responsiveness of your MacBook Pro for the purposes of working with audio.
All that being said, you may find that you won’t be able to use the latest versions of audio and music production software since your laptop is a bit older than is recommended.
Ultimately my recommendation would be to first try the upgrade. For less than $200 and an hour of your time, you’ll have a laptop that performs like you put a rocketbooster on it, and it may be the perfect starter music production computer for you. The only issue you may encounter in the short term is a limited ability to run a lot of plugins simultaneously… this is mostly due to the older intel core 2 duo.
Hope this helps, and let me know if you have any questions.
-J
thank you for Mandy
Hi Mandy,
Thanks for reading!
-J
Thank you for doing this project. It will help when i setup my new podcast, audio-video studio!
Glad I can help, Oscar!