Snapshots are a feature of APFS (Apple File System) that has been part of the macOS since High Sierra. A snapshot captures the state of an APFS formatted drive, and preserves all the files on the drive, as they appeared when the snapshot was taken. If you ever need to, you can roll back the drive to its previous state.
Apple makes use of the snapshot feature whenever a system update is performed. Before the system update is applied, a snapshot is taken of the startup drive, ensuring that if something goes wrong with the update process, you could recover from the problem quickly and be back right where you were before you started the system update.
In this Rocket Yard guide, we’re going to take a look at APFS snapshots, how they’re created, managed, and deleted, as well as the advantages and disadvantages of snapshots.
Snapshots Take Up No Space, But Can Magnify the Amount of Data Blocks Used
When a snapshot is initially created, it takes up no additional space on the volume. A snapshot essentially marks all the currently used data blocks on a volume to be preserved; that is, no changes can be made to them. At the moment a snapshot is taken, there’s no increase in the space used on a volume.
Note: Apple has supported local snapshots on HFS+ formatted drives since OS X Lion. APFS-based snapshots use an entirely different mechanism even though Apple has continued to use the “local snapshot” nomenclature for both types of file system snapshots. In this guide, we’re specifically dealing with the APFS snapshots.
Snapshots leverage the APFS’s copy-on-write system. When there’s a need to write data, such as when you’re editing a file, a new data block is used to hold the changes you’re making, instead of writing the data back to the original block.
Normally the old data block can then be marked as free and available for use. However, if the block is marked as preserved, such as when a snapshot has been generated, the old block remains and is not freed up for use.
Editing a file can significantly magnify the amount of space being used, as the old versions of the file are retained in the snapshot, while outright deleting a file frees up no space at all since the snapshot will retain all the preserved data.
Creating a Snapshot and Rolling Back a Snapshot is Fast
A big advantage to snapshots is how quickly they can be created. Only the volume’s metadata is being copied, so the process is lightning-fast, especially when compared against conventional backups. Rolling back to a snapshot is also quick; just the metadata needs to be restored since all the actual information in a snapshot data block was never changed.
Deleting a Snapshot is Difficult
Unwinding a snapshot can be a difficult process, as the system needs to go through each data block and remove the preserved setting, decide if the data block still contains active information, and free up the data blocks that aren’t currently in use where it can.
Snapshots Are Not Backups
On the surface, it looks like snapshots perform the same function as a backup, but have the added advantage of being quick and easy to create, as well as providing the ability to use a snapshot to recover from a problem quickly.
Seems pretty good, but snapshots have a few downsides. First up, snapshots are part of the startup drive. They don’t exist anywhere but on the same startup drive as the
Creating Snapshots
APFS snapshots are only supported on drives using the APFS format. If you’re using any other file system, such as HFS+, APFS snapshots will not be available. If you’re using a drive with APFS, you have a few options available for creating and managing snapshots.

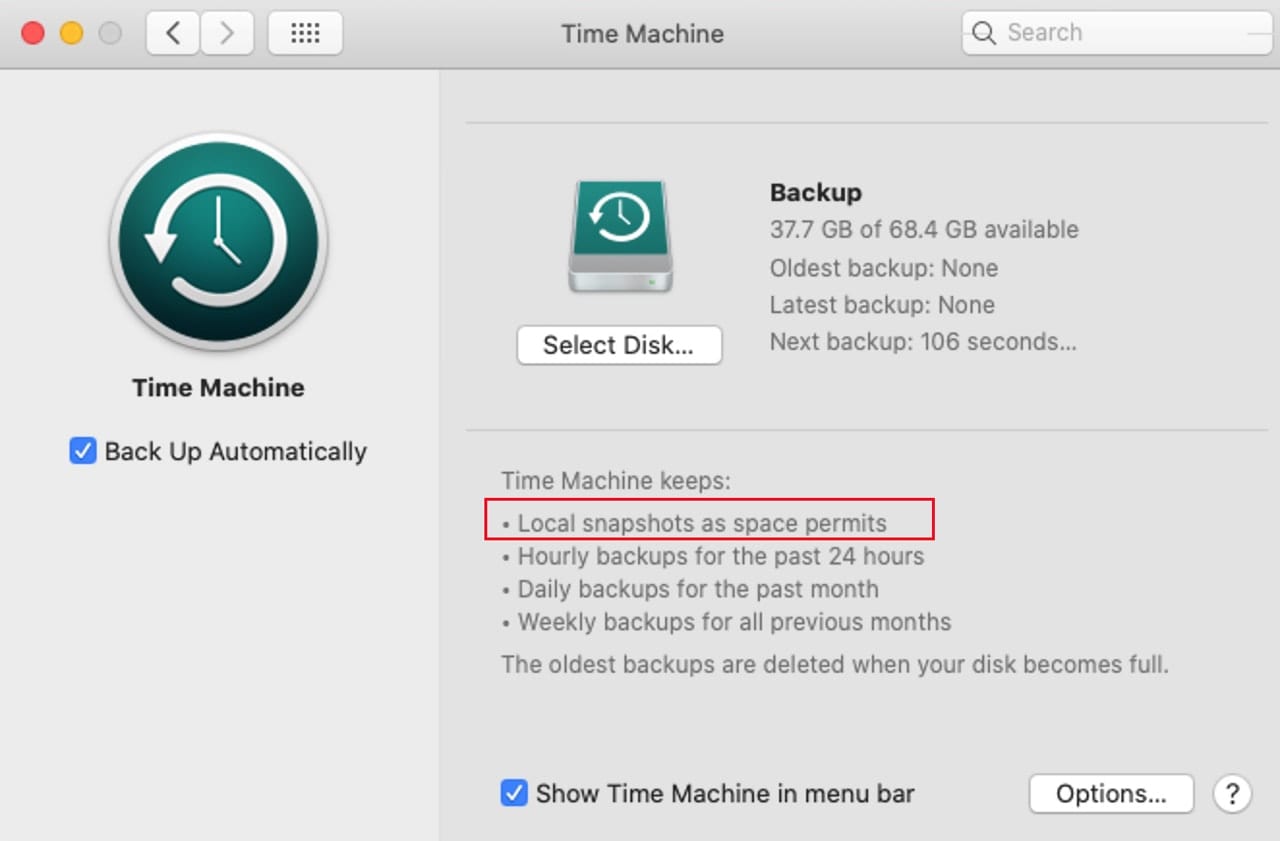
Time Machine: Time Machine gained support for APFS snapshots with macOS High Sierra. Some sharp-eyed Time Machine users may have noticed an addition to the description of the types of data Time Machine keeps. When you open the Time Machine preference pane, you’ll see “Local snapshots as space permits” is now part of the description of what Time Machine does.
Time Machine will use APFS snapshots of your startup drive provided it’s APFS formatted, isn’t in Time Machine’s list of excluded items, and there’s a significant amount of free space available.
Time Machine performs the following snapshot management functions:
- Creates a snapshot of the startup volume approximately every hour, and keeps it for twenty-four hours before it is automatically removed.
- Creates a snapshot of the last successful Time Machine backup, and keeps it unless space is needed.
- Creates a snapshot before installing any macOS update.
tmutil: tmutil is a command line tool for controlling Time Machine. It offers a number of actions for creating and managing APFS snapshots. The Terminal app is used with the tmutil commands.
You can find information about using Terminal in the guide:
Tech 101: Introduction to the Mac’s Terminal App, Part One
How to create an APFS snapshot:
Open Terminal and enter the following at the prompt:
tmutil localsnapshot
Press enter or return.
A new snapshot will be created with the current date and time appended to its name.

How to list existing APFS snapshots:
Enter the following at the Terminal prompt:
tmutil listlocalsnapshots /
Press enter or return.
Terminal will list the snapshots stored on the startup drive. You can specify a different drive by replacing the “/” in the command with the full pathname to another drive.
How to delete an APFS snapshot:
To delete a specific snapshot, you need to know the creation date of the snapshot you wish to delete. The easiest way to find the date is to use the listlocalsnapshots command above. It will list each snapshot by name, which includes the data and time appended to the name.

As an example, if I list local snapshots on my Mac in Terminal I get:
tnelson@Toms-Mac ~ % tmutil listlocalsnapshots /

Snapshots for volume group containing disk /:

com.apple.TimeMachine.2019-12-06-152818.local

com.apple.TimeMachine.2019-12-07-171533.local
The portion of the name after TimeMachine. and before .local are the date and time. If I wanted to delete the snapshot named com.apple.TimeMachine.2019-12-06-152818.local, I would enter the following Terminal command:
tmutil deletelocalsnapshots 2019-12-06-152818
Press enter or return.
Mounting a Snapshot
It’s possible to mount a snapshot on your Mac’s desktop and use the Finder to restore an older file from the snapshot. There doesn’t seem to be any advantage to doing this versus just using the normal Time Machine interface to find and restore a file, however, it may be interesting to see all the files in a snapshot.
In order to mount the snapshot, you need to create a directory that will be used as the snapshot’s mount point. I suggest using the /private/tmp folder to create a directory named snappy so the mount point will be removed automatically when you log out of your Mac.
At the Terminal prompt, enter the following:
mkdir /private/tmp/snappy
Press enter or return.
To mount a snapshot, you need to know the snapshot’s name, which you can find out using the listlocalsnapshots command outlined above. Once you have the name, you’re ready to mount the snapshot. In this example, I will mount my snapshot named com.apple.TimeMachine.2019-12-07-171533.local.

At the Terminal prompt, I would enter:
mount_apfs -s com.apple.TimeMachine.2019-12-07-171533.local / /private/tmp/snappy
and then press enter or return.
The snapshot will be mounted on the desktop.
With the snapshot mounted on the desktop, you can use the Finder to browse through the snapshot’s information. You can copy files from the snapshot, but you cannot move, delete, or add to the snapshot.
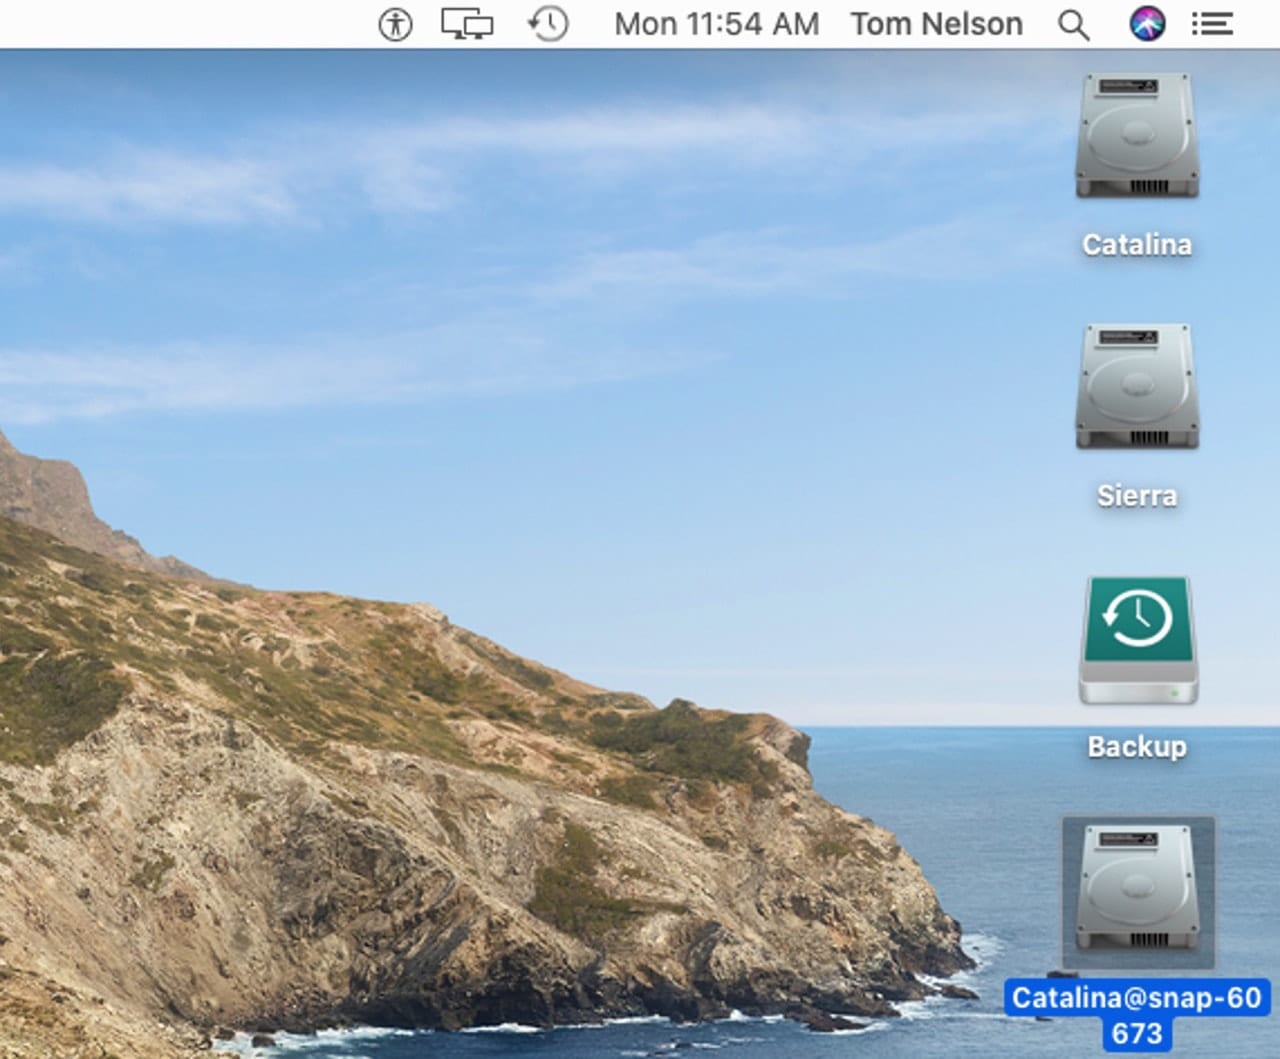
After examining the snapshot, you can remove it from the desktop by ejecting it (right-click on the mounted snapshot and select Eject from the popup menu).
Restoring a Full Snapshot
If you need to roll back your Mac to the state it was in when a snapshot was taken, such as after a software upgrade that went bad, you can do so by booting into the Recovery environment and using the instructions from the Rocket Yard guide:
How to Restore Data From Time Machine Backups
Use the instructions in the “Restoring a Full Time Machine Backup” section. When you get to the step for selecting a Restore Source, be sure and select the startup drive that holds the local snapshots, and not your Time Machine drive.
After that, just follow the onscreen instructions to restore from a selected snapshot.
Warning: All information added after the selected snapshot’s date will be lost when the snapshot is restored.
Snapshots and You
APFS snapshots are a relatively new tool that can be used as part of an effective backup and recovery strategy. Time Machine users have an advantage with the Time Machine app able to manage snapshot creation and deletion for them.
It may be tempting to keep a number of snapshots around to allow you to recover to various points in time. But snapshots should be kept to a minimum so they do not excessively impact your storage usage. Instead, use Time Machine or another favorite backup app for the bulk of your backup needs, and just be aware that snapshots are a recovery option should something go wrong when you install new versions of the macOS.
Have you been working with APFS snapshots? Let us know in the comments below.





What a wonderful guide! Thank you so much. I’m now at a loss because my TimeMachine fails miserably mid-backup to my HFS+ External drive (Error: Failed to write unlock record UUIDs as extended attribute for disk ‘/’, error: Error Domain=NSPOSIXErrorDomain Code=1 “Operation not permitted”) for 2 weeks now. It keeps aggregating more and more snapshots on the boot drive, and never removes them (probably because of the backup failure). I wonder what to do… The external TM backup drive passes all tests, and 2 other Macs backup to it without a problem — I don’t want to erase it and start anew.
OF COURSE I have a CCC backup of my internal drive, but still…
I need to read through this again for better understanding, but snapshots have become a major pain in the butt for me. I see the comment that they take up no space, but after a recent trip to Terminal to delete a bunch, I gained back about 300+ GB of space.
And forget a quick trip to Disk Utility (either via internal Recovery Drive or Internet Recovery); what used to take about 20 minutes now takes several hours as Disk Utility checks snapshot after snapshot (I had over 50 last time I started Disk Utility).
(Now, all this was under Mojave; I’ve just gone to Catalina so maybe a few things have been cleaned up.)
Really appreciate your Rocket Yard posts. In prior blog posts (3/15/18) about Time Machine backups, you discuss using Stefan Klieme’s TimeMachineScheduler & TClementDev’s TimeMachineEditor utilities, & you noted TimeMachineScheduler’s compatibility with macOS High Sierra. I can’t find anything on Klieme’s webpage about compatibility with macOS Mojave or Catalina. The Time Machine Editor’s webpage shows a 9/27/19 update & says it includes compatibility improvements for macOS Catalina.
Do you folks have any recent experience with TimeMachineScheduler or TimeMachineEditor in Catalina?
Thanks for all the good work.
Hi Kevin,
As far as I can tell, TimeMachineEditor is up to date and will work with macOS 10.9 and later including Catalina. I have not personally used TimeMachineEditor, so if you give it a try, stop back and let us know how you like it.
Tom
Downloaded TImeMachineEditor yesterday after posting here. Quick, no-drama, install. Dead simple app. Minimal Preferences: auto update & admin PW options. Uninstall feature included. Main window has fields for: back-up intervals (when inactive, interval, calendar interval); interval values (hourly, daily, weekly); a do-not-backup field with hourly settings; option to create local snapshot. TME requires user to disable automatic backups in Time Machine. Otherwise TME works with existing Time Machine & Energy Saver (Power Nap) settings in System Preferences.
I’ve run it for almost 24 hours. TME causes hourly backups & snapshots (per my settings) even when my iMac is inactive. The Time Machine icon in top menu bar still reports backups as they occur & last backup time. TME seems minimally intrusive & well integrated with Time Machine. TME backup schedule seems more predictable & regular than the native TM scheduling.
One complication: My iMac backs up to separate drives on an OWC Dual Drive Dock (CCC backups weekly to SSD; TM backups at all other times to HDD). When switching between TM & CCC backups I would normally disable automatic TM backups using the TM icon in menu bar, unmount the operating backup drive, then toggle drive switches on the OWC dock (with a 30-45 second interval between switching off-on; it’s a Thunderbolt connection). Now that TME controls TM backups on the iMac, I have to remember to temporarily disable them in TME settings as part of this protocol instead of using the TM automatic backup checkbox. I’m counting on the unchecked TM automatic backup box to be my visual cue to go to TME settings. Not sure how big a problem I’ll have if I ever forget to do this & a TME backup starts while I’m doing a CCC backup to the other external drive.
just following thread….