

In part one of our Guide to Family Sharing, we learned how to set up the service. In part two of our Guide to Family Sharing, we’ll take a look at how to share various purchases and subscriptions, and make use of shared Photos and iCloud storage.
There are a number of other items that can be shared with family members, including calendars, reminders, and the Apple Bookstore. But the ones we mentioned above seem to be the most popular.
Subscription Sharing
Family sharing allows you to share various subscriptions to Apple services, including:
- Apple Music
- Apple TV Channels
- Apple Arcade
- Apple News+
In some cases, a Family subscription at a slightly higher price is required, such as with Apple Music, while other subscriptions have no additional cost for Family Sharing. Sharing a subscription is similar across all of the Apple offerings, so we will demonstrate sharing Apple Music as an example.
Note: Some subscription types may require specific versions of the Mac OS or iOS. If you’re planning to share a subscription, make sure each family member is using the appropriate version of the operating system on their devices.
macOS Catalina and later: Launch System Preferences and select the Family Sharing preference pane.
macOS Mojave and earlier: Launch System Preferences and select the iCloud preference pane, then click the Manage Family button, followed by selecting the My Apps & Services tab.
Select the Apple Music item.

If you don’t have a current subscription, click the Start a Free Trial button. This will open the Music app (macOS Catalina or later) or the iTunes app (macOS Mojave and earlier), where you can subscribe to the Apple Music service. Be sure and select the Family plan.
Once the Apple Music subscription is set up, you’ll see the updated status in the Family Sharing or iCloud preference pane.
Family members are able to sign in to Apple Music with their own Apple ID, and play, download, and stream music from the iTunes or Music app. Each family member has their own music library, and access to an iCloud Music Library they can use with just about any device.
You can find out more about using Apple Music in the Rocket Yard guide: Almost Everything You Need to Know About Apple Music.
Most of the other Apple subscription services work the same way with Family Sharing. The Family Sharing/iCloud preference pane can be used to subscribe to a service that will be shared with family members. Otherwise, the preference pane serves more to show if you’re subscribed or able to use the service.
If you’re the one who subscribed to an Apple service, you can manage the subscription using the Rocket Yard guide: Master Your Apple Subscriptions.
Sharing App Store Purchases
Most apps that you have purchased can be shared with other Family Sharing members, though there are a number of exceptions:
- App developers can choose to have their apps be unavailable for Family Sharing, though many app creators allow Family Sharing.
- The purchaser of an app can choose to hide it from other Family Sharing members. This will not hide the fact that it was purchased; it only prevents the app from being shared with other members.
- In-app purchases are not shared.
- Apps that are no longer available from the App Store can’t be shared.
To download and use a shared app, do the following:
macOS Mojave and later
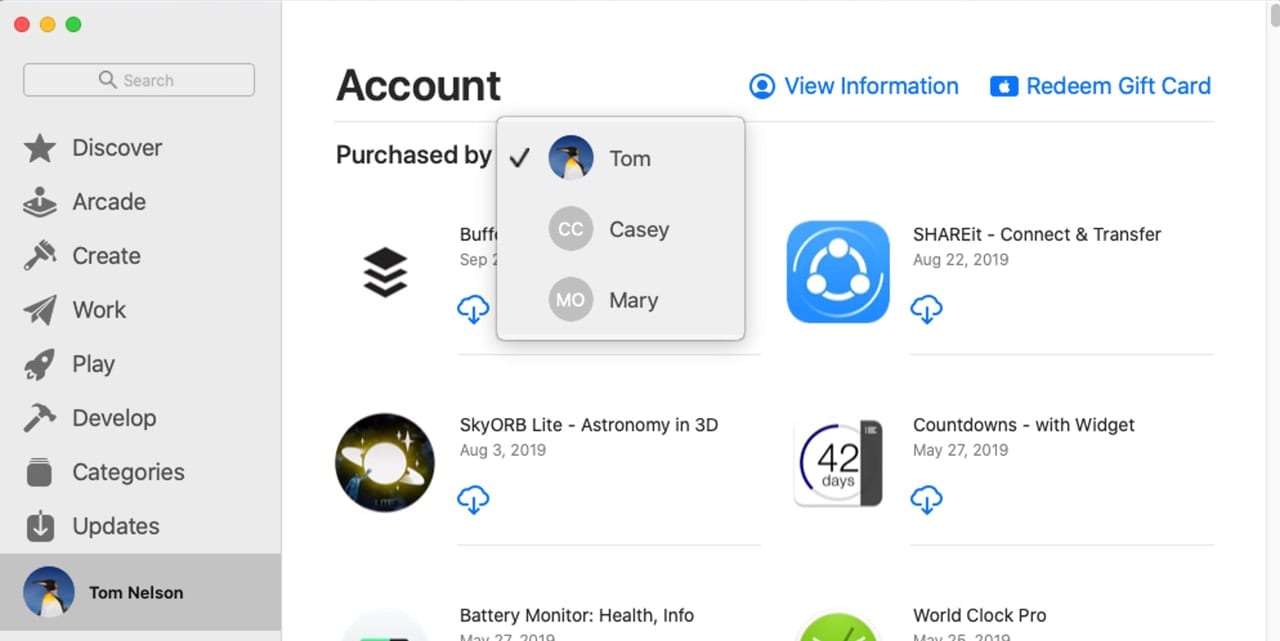
Download shared apps: Open the App Store and select your name at the bottom of the sidebar. A list of purchased apps will be displayed.
From the Purchased by dropdown menu, select the individual family sharing member whose app you wish to download and use.
Find the app you wish to download and click or tap the download button.
The app will be downloaded and installed on your Mac.
You can find the app in the /Applications folder or as a new entry in the LaunchPad app.
Hide shared apps: There may be times when you don’t want others to be able to use a specific app you’ve purchased. You can hide an app from others with this process:
In the App Store, select your name at the bottom of the sidebar. A list of purchased apps will be displayed.
Make sure the Purchased dropdown menu is set to your name.
Scan through the list of purchased apps until you find the one you wish to hide.
Hover over the app name till you see three ellipses (…) appear next to the download button.
Click the ellipses and select Hide Purchase from the popup menu.
A sheet will appear, asking you to confirm that you wish to hide the selected app. Click the Hide Purchase button.
Unhide shared apps: In the App Store, select your name from the sidebar.
In the top right, select the View Information button.
You may be asked to provide your Apple ID.
In the Account Information sheet that opens, find the Hidden Items section, then click on the Manage button.
Find the app you wish to make available to other members, and then click the Unhide button.
macOS High Sierra or earlier
Download shared apps: Launch the App Store, usually located in the Dock as well as in the /Applications folder.
Select the Purchased tab. You may need to log in with your Apple ID to access the purchase history.
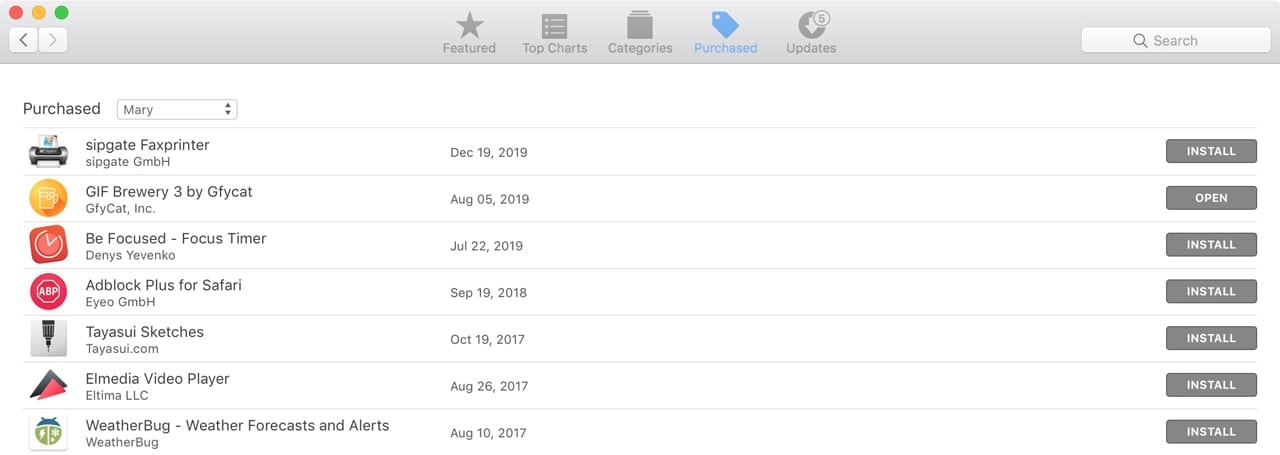
At the top of the page, use the Purchased dropdown menu to select the family member who has the app you wish to download and use.
Locate the desired app from the list and then click the Install button.
The app will download to, and be installed on, your Mac.
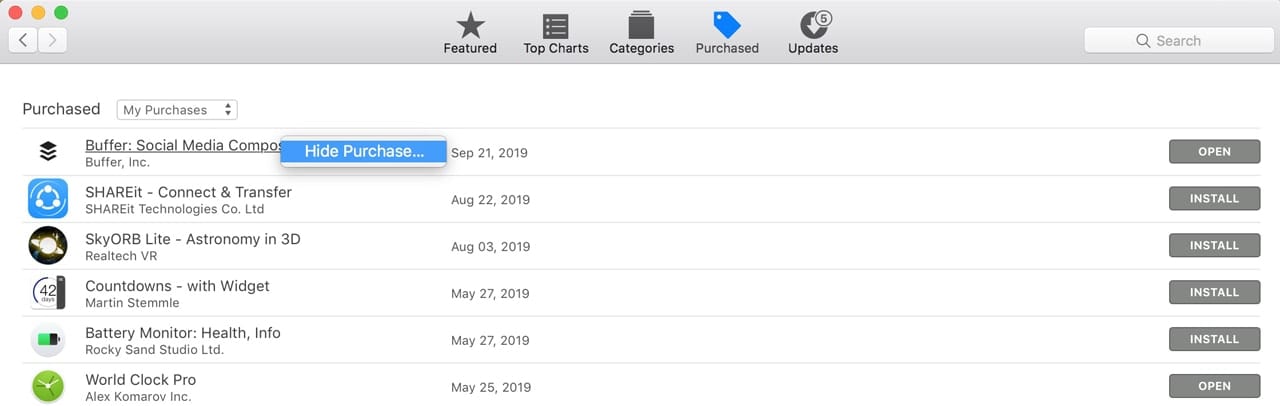
Hide shared apps: From the Purchased tab, scroll through the list of apps till you find the one you wish to hide.
Right-click on the app’s name, and then select Hide Purchase from the popup menu.
A sheet will drop down asking you to confirm that you wish to hide the selected app. Click the Hide Purchase button.
Unhide shared apps: From the Store menu of the App Store, select View My Account.
You may be asked to sign in with your Apple ID.
The Account Information page will open. Scroll down to the Hidden Items section and select the Manage button.
A list of hidden apps will be displayed. Find the one you wish to make visible and select the Unhide button.
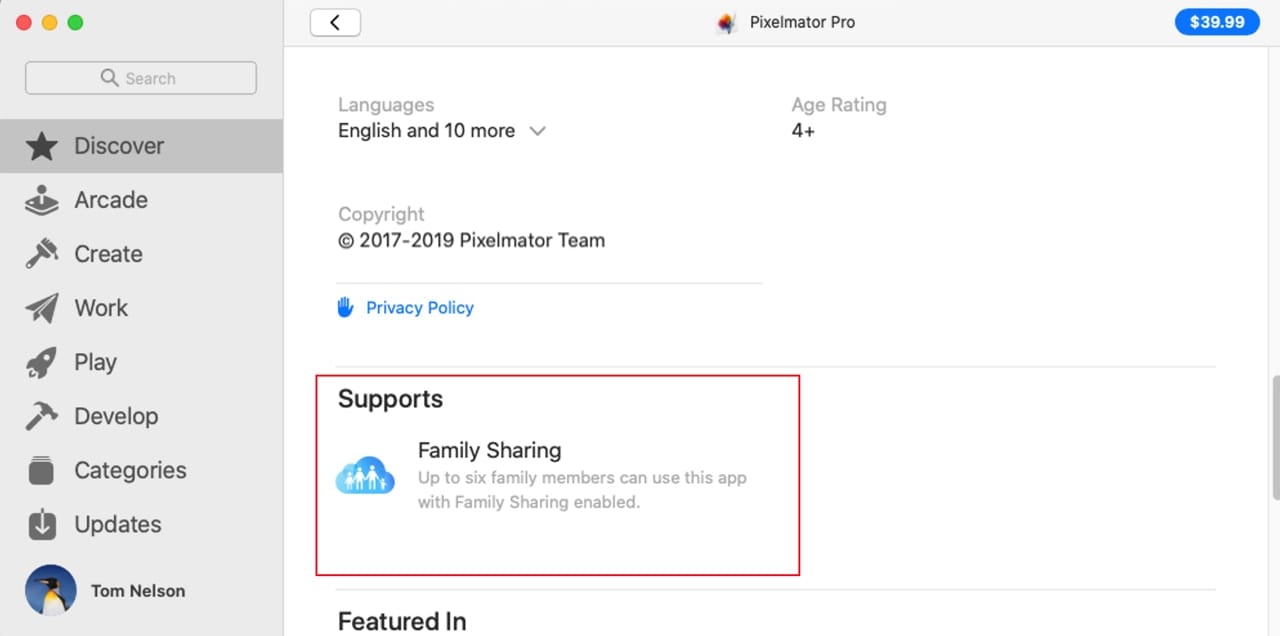
Is an App Eligible for Family Sharing?
Not all apps are allowed to participate in Family Sharing. You can find out if an app you’re interested in can be shared by doing the following:
Launch the App Store and find an app you’re interested in purchasing.
View the app’s information page by clicking on the app’s name.
In macOS Mojave and later, scroll down through the information about the app until you come to the Support section.
If you see Family Sharing listed, the app can be shared.
In macOS High Sierra and earlier, look at the far right section of the app’s page and locate the Information section. The Family Sharing status will be listed as Yes or No.
Note: Remember, when purchasing an app that you plan to share, any in-app purchases are not included. This can be important for some apps where the basic app is free or inexpensive but requires a subscription to get the most out of the app. In most cases, the subscription is an in-app purchase and can’t be shared with other family members.
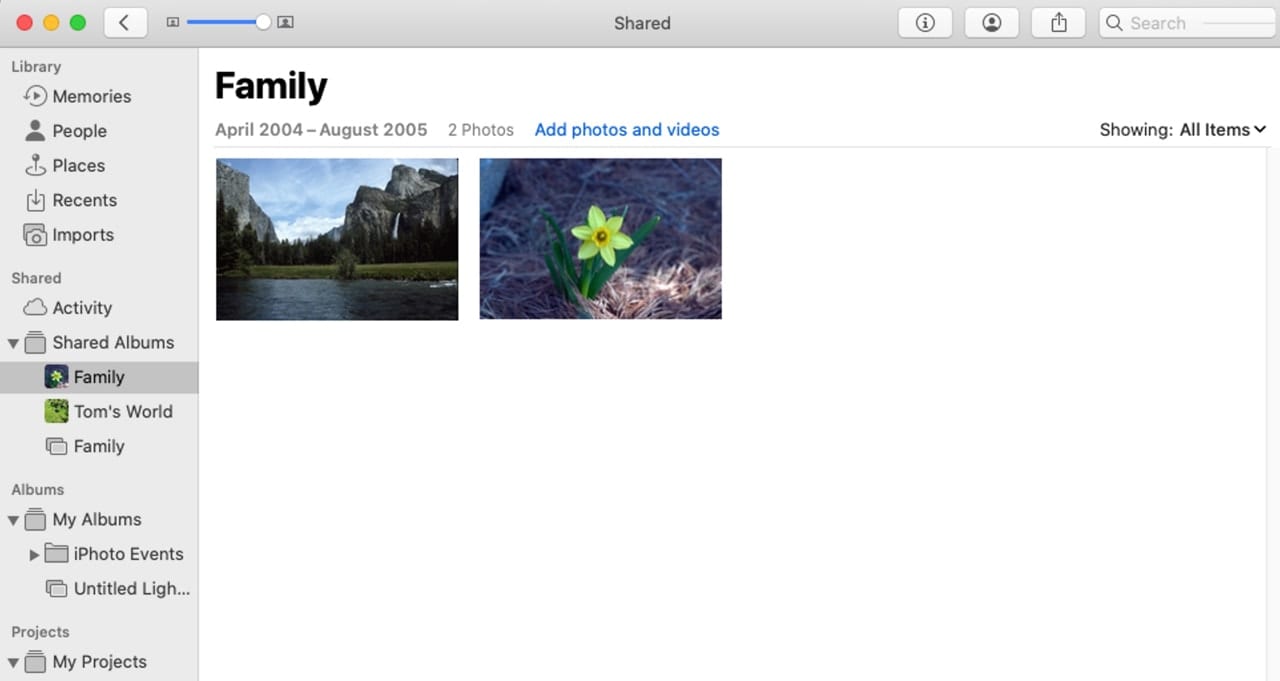
Photo Sharing
Family Sharing members can share photos they take directly from the Photos app. If you open the Photos app, you’ll see that a new album has been added in the Photo app’s Shared section of the sidebar. The new album is called Family; any picture that a Family Sharing member has set to be shared will appear in the Family Album.
You can share an image by locating the photo you wish to share and right-clicking or command-clicking on the image and selecting Share, Shared Album from the popup menu. A list of shared albums you have set up, including the Family Album, will be displayed. Select the Family Album, and the image will be shared with all family members.
You can remove a shared image by opening the Family Album, right-clicking on the image you wish to remove, and selecting Delete from Shared Album. A sheet will drop down to warn you that deleting the image from the shared album will remove the image from all your devices and any subscribers (family members) devices. Click the Delete button to remove the image.
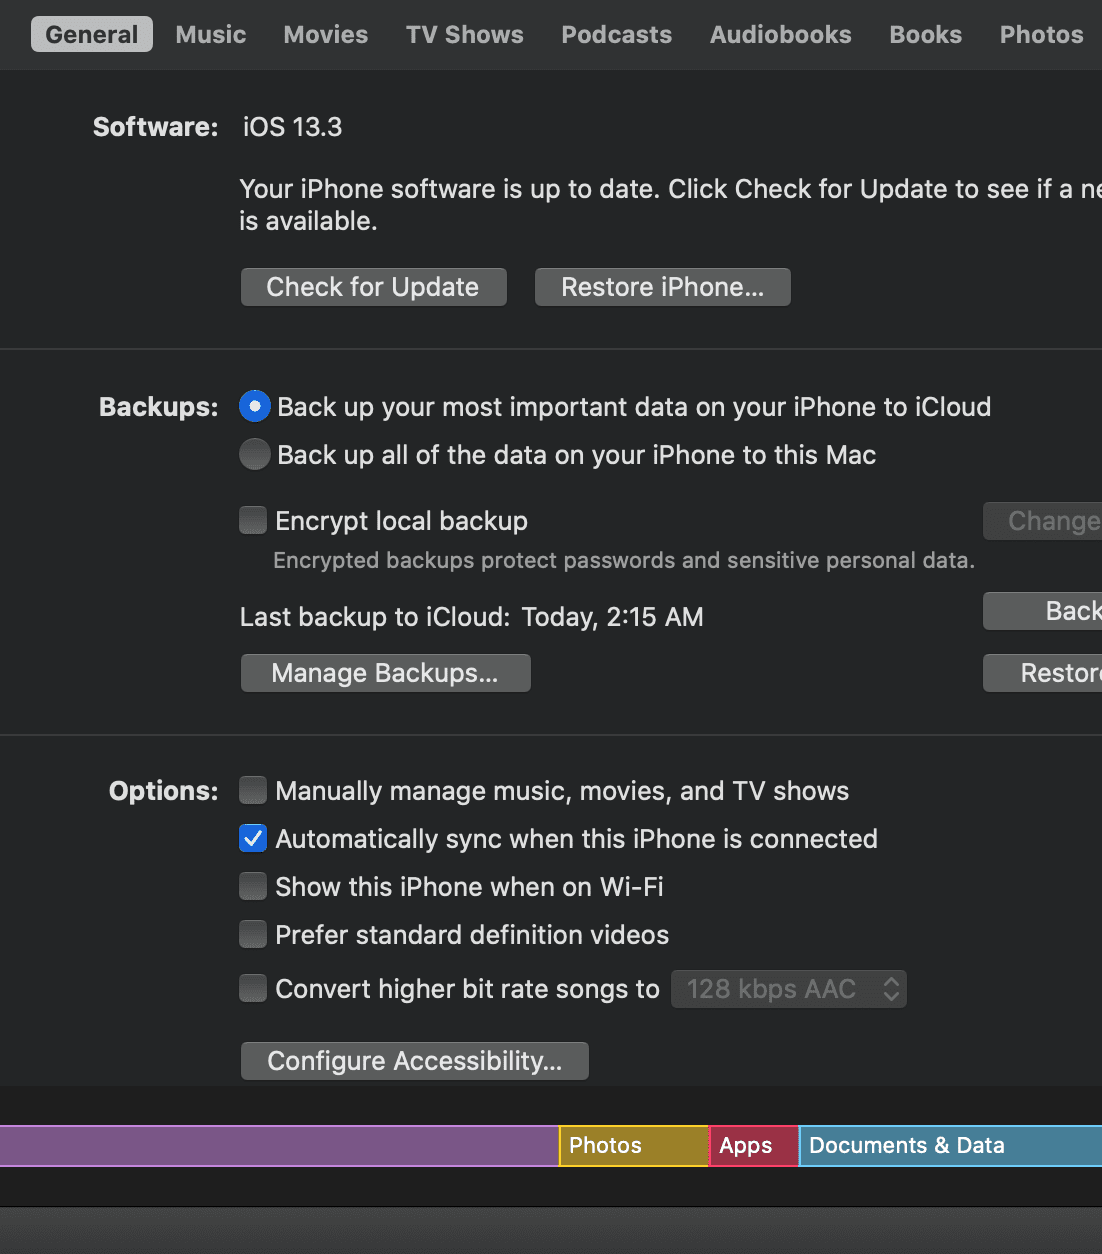
Share iCloud Storage
Family Sharing allows you to share a 200 GB or 2 TB iCloud storage plan with all of your family sharing members. Your information remains private, just like a normal iCloud storage plan. The difference is that available storage space is shared among all members.
Shared iCloud storage doesn’t work with the free 5 GB storage plan. If you want to share one of the larger storage plans, the family organizer should upgrade their iCloud storage plan first.
macOS Catalina and later: Open System Preferences and select the Family Sharing preference pane.
Select the iCloud Storage item in the sidebar.
Click the Share button and follow the on-screen instructions.
Tip: If you don’t see a share option, you likely need to upgrade to one of the paid storage plans.
macOS Mojave and earlier: Open System Preferences and select the iCloud preference pane.
Select the Manage Family option from the sidebar.
Select the My Apps & Services tab.
Select iCloud Storage from the sidebar.
Click the Start Sharing button and follow any on-screen instructions.
Sharing is Fun
Using Family Sharing is a great way to not only share apps, subscriptions, and other purchases but to help keep costs down within a family. We’ve only touched on the more popular sharing options; there are plenty of others. If you’ve been using Family Sharing with any of the sharing options, let us know how you’re making use of them in the comments section below. Be sure to include any issues you’ve come across, to help other readers.


Does Family Sharing allow me to share all of my iTunes library or only what I have purchased from the iTunes store?
I’m asking because I used to subscribe to iTunes Match and matched – and therefore shared – copies of all my music CDs with Apple.
I would like to be able to share also this music with my family members but don’t see this described clearly anywhere.
Thank you very much in advance
Philip
I have the same question – I found a document that says if you have an Apple Music account, it includes Match (the ability to upload our own music) so you don’t need Match and if you cancel Match, what you uploaded is still there. I’m just reluctant to pull the trigger!