

Last week, The Rocket Yard showed you how to use Apple’s Numbers spreadsheet app for iOS and iPadOS to capture info with forms. This week, we’ll show you how to use the free Keynote app for Mac to create a fancy photo slideshow.
Why Not Just Use the Photos App?

You’re probably asking yourself, “Wait, why not just use the Photos app to create a slideshow?” There are some good reasons to use Keynote for your slideshows instead of Photos:
- You can quickly import a lot of photos to make individual slides
- Each photo slide can be edited for scale and adjusted for color
- More text annotations, slide transitions, and effects are available in Keynote than in Photos
- You have a choice of music and voice narrations that can be added to the slideshow
- You can export your slideshow as a video for sharing
Let’s get started by creating a quick slideshow.
Create A New Document
First, we need to create a new Keynote document. On the Mac, launch Keynote and select a template from the choices available. You’ll also have a choice of aspect ratio — the ratio of image width to height. Back in the days of photo film, just about every photo had either a 1:1 (square) or 4:3 aspect ratio. Digital cameras have changed that, and our Keynote slide templates come in either 4:3 or 16:9 aspect ratios.
If you plan on using AirPlay to show your slides on a standard flat-screen TV, then the 16:9 aspect ratio is probably your best bet. You can also select any one of the templates, but I found the Photo Essay template to be one of the best for slideshows.
Before we start playing with our images, let’s import them into Keynote.
Import Images
In order to get the best possible resolution for your photos, it’s a good idea to export them from the Photos app into a folder on your Mac.
In the Finder, create a New Folder by either right-clicking and selecting New Folder, or by using File > New Folder in the menu bar. As an example, I made a new folder on my Mac desktop named “Slideshow”.
Next, I launched the Photos app. Since I like taking pictures of flowers, I decided to search for flowers, then find my best photos to export to the folder. Going through the pictures, I just used a Command (⌘) – click to select multiple images.
Once I picked the photos, I selected File > Export > Export Unmodified Original to move the images to my folder. Once the export was completed, I quit Photos so I could better focus on my Keynote slideshow.
Your Keynote “deck” currently has just one slide — a title slide. Make sure that you can see both the contents of your slide folder and Keynote, then select the photos and drag them to the left sidebar where the app usually displays thumbnails of the slides. Drop the photos, and they are imported into Keynote with one photo per slide.
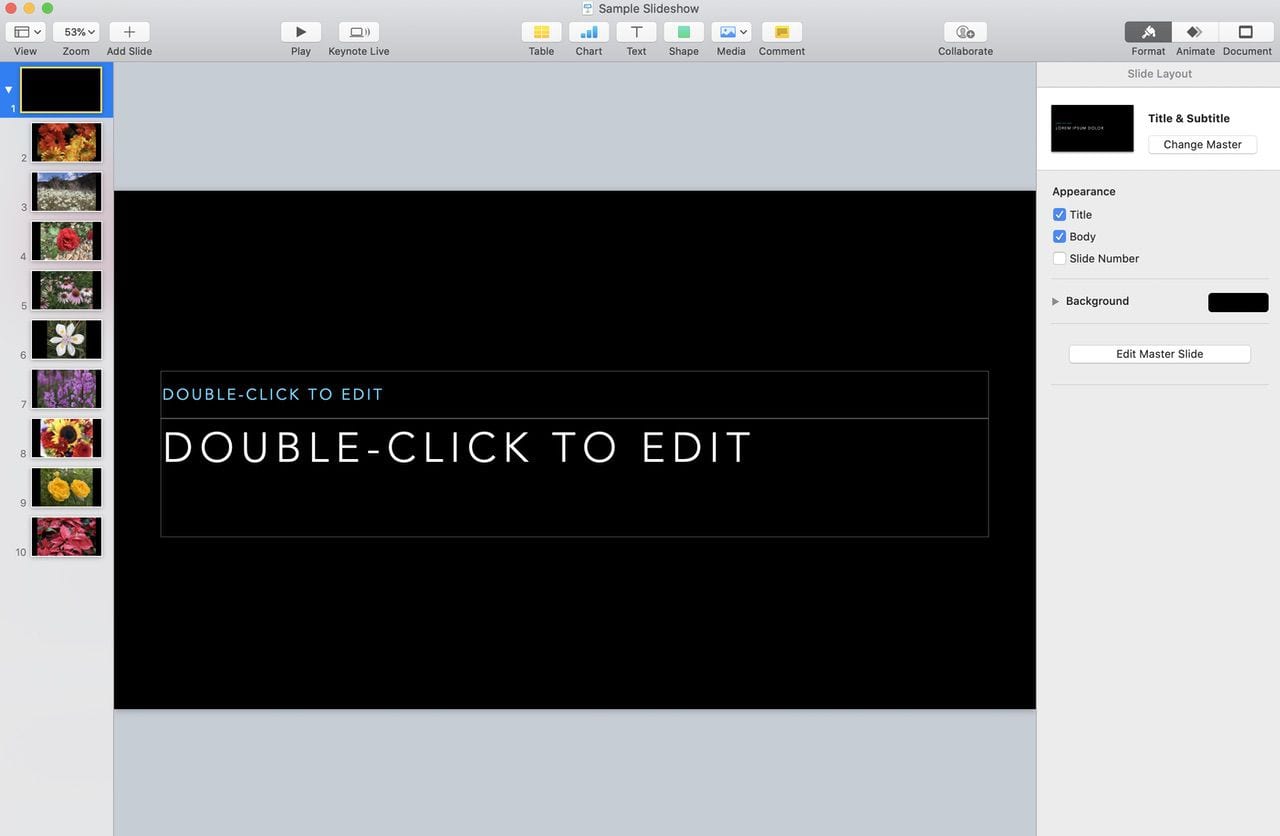
You’ll probably notice that if you chose a template with text on it, the text is behind your photos. We’ll take care of that in the next step. The first slide, as seen in the screenshot above, is a placeholder title slide.
Add Text Annotations
I give a lot of photo slideshows, and I know how boring it can be to talk to multiple audiences about each slide. What we’ll do is add text annotations on some slides, then add narration later. Now you don’t have to be physically at a location to share a slideshow; instead, you can just send someone the movie version of it and they can view at their leisure.
Let’s start with the text. Our first slide is just a title slide, so I’ll add my name and the title “The Flowers of Spring”. Moving on to the second slide, I notice that the default slide “master” is a text title with bulleted items beneath it. That’s really much more than I want, so under Slide Layout on the right side of the Keynote window, I click Change Master and switch to Photo – Horizontal.
Now my image is a 4:3 photo on a 16:9 slide, so I can drag the corners of the picture out to make the photo fit the slide. If you normally take photos in a 16:9 aspect ratio, they’ll fit the slide format perfectly.
To edit the title of the slide, click the word “Title” under Appearance in the Slide Layout. That brings the Title text to the top of the image. Double-click the text to highlight it, then type your text over the placeholder. My second slide now looks something like this:
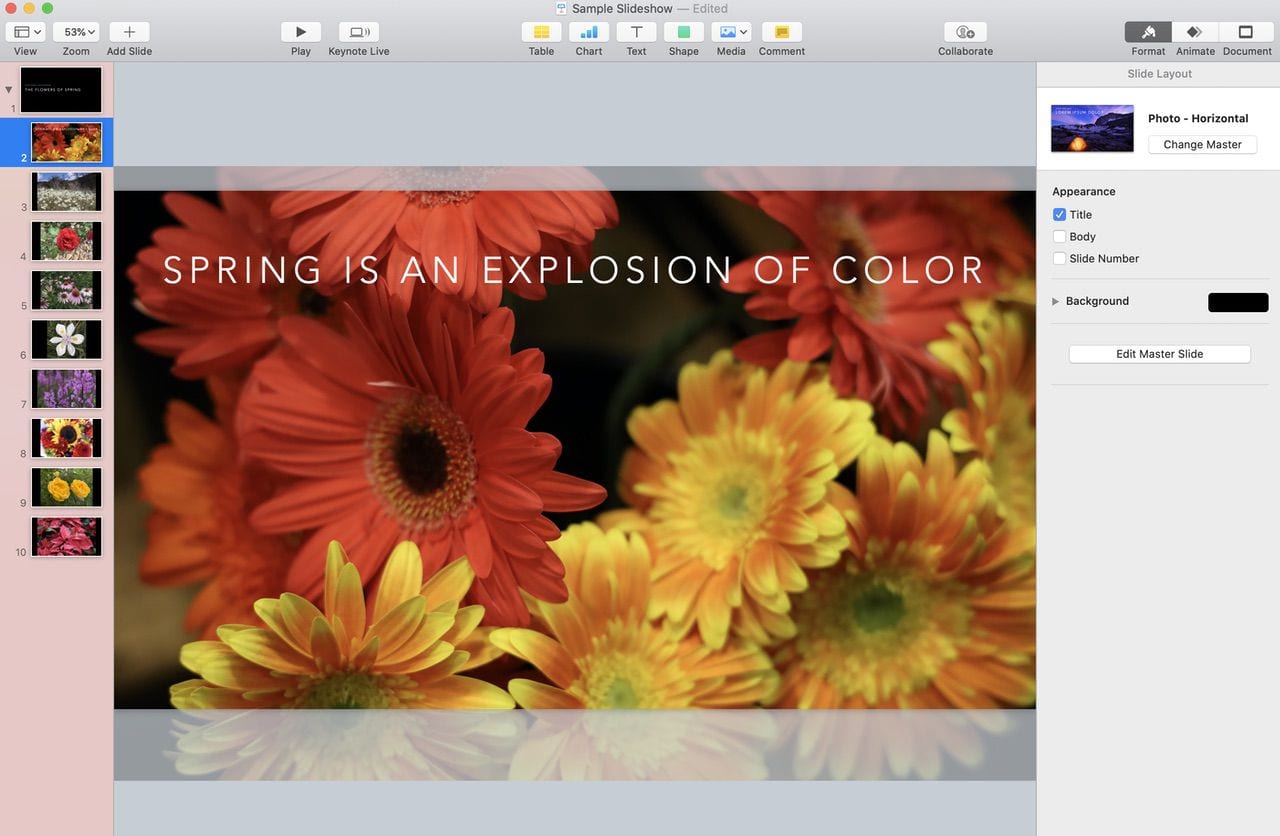
In this image, notice that the photo “spills over” the size of the slide. The “greyed out” areas won’t be visible during your slideshow.
You can now go to the rest of your slides, adding text where you wish. It’s possible to add more text — like a slide number or body text — but I always find that it’s best to minimize the words to the bare minimum to describe the photo.
Add Transitions
To give your slideshow a truly professional look, add transitions between the slides.
For the first slide, I decided to use the “Fade Through Color” transition. To add a transition, click the slide to select it, then click the Animate button in the upper right corner of the Keynote window. Click “Add an Effect” and a pop-up menu with all of the available transitions appears. Once you’ve selected one, you can change various things like the duration of the transition, when the transition begins, whether or not the transition starts with a click or automatically, and so on.
Here’s an example of what the transition looks like for our first and second slides:
It’s a good idea to click the Preview button for each transition you set up so you can make sure that it fits with the theme of your slideshow. You can always click the “Change” button and try another transition if you don’t like how it looks.
Add a Narration or Soundtrack
To make a slideshow that can be viewed without your physical presence, you’ll want to add a narration. Perhaps the annotations you made on your slides tell the story and just some nice background music will suffice.
Adding a narration is simple: you just use Keynote’s built-in recording feature to record your voice, edit the recording (if necessary), and then add it to your slide.
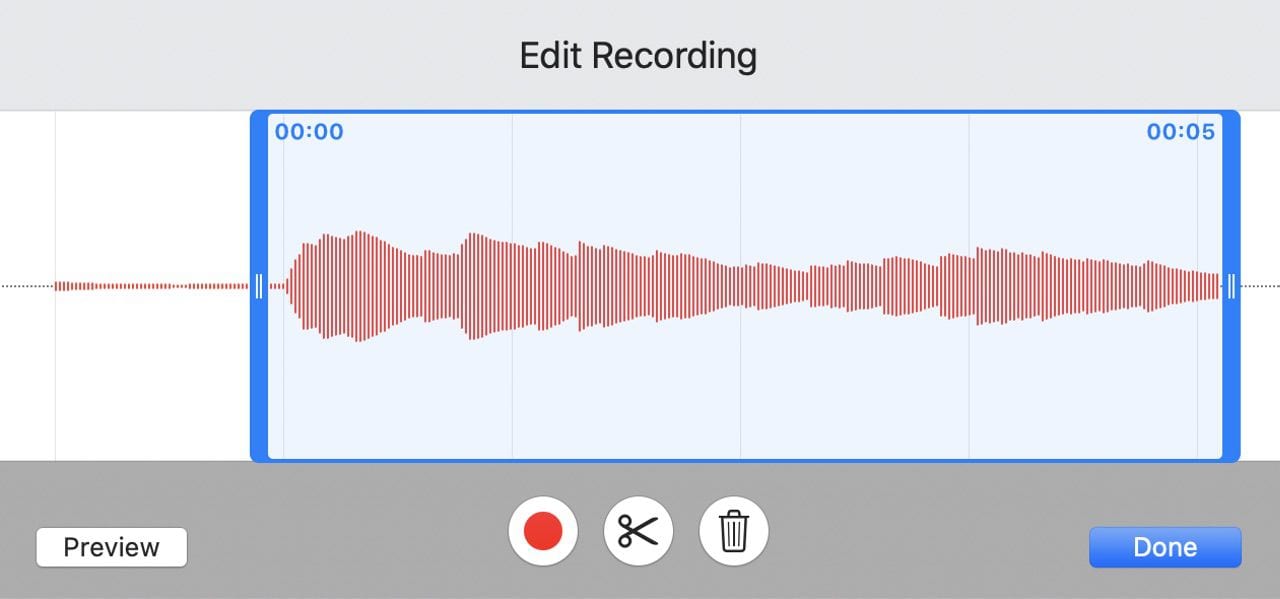
Click the Media button on the Keynote toolbar (it looks like a small picture), then select Record Audio from the pop-up menu. Record the narration by clicking the red Record button, and speak. When you’re done, click the button again. You now have the option to listen to the recording and edit it by trimming the beginning or end.
If you’d rather add a music soundtrack, click the Media button and select Music. This opens your Music library, at which time you can select a song or songs to accompany your slideshow. For slideshows that are going to be for you or your family, it’s fine to use any song in the library. However, if your slideshow is for public viewing, you’ll need to be cognizant of music copyrights.
There are a number of websites that provide royalty-free music that can be used in videos and slideshows(with proper attribution), such as SoundImage and BenSound. Download the MP3 files you want to use, and remember where you have stored them.
Chances are good that you’ll want the music to play in the background during the entire slideshow rather than just on one slide. To do this, click the Document button at the far right of the toolbar, then click Audio. To add your soundtrack, drag the file to the Soundtrack box in the right sidebar (where it says “Add Audio Files”), and drop it.

See “Record Slideshow” and the “Record…” button in the screenshot above? If you’d like to record a narration for the complete slideshow, here’s where you do it. The narration is layered with the soundtrack so it and the music are heard at the same time.
Make a Self-Playing Slideshow
Remember, if you send the slideshow to another person they may not necessarily know how to get it running. That’s why it’s a good idea to make the slideshow self-playing.
To do this, click the Document tab under the Document toolbar button. Here you can set an automatic delay in transitions and builds, although it’s a much better idea to do this before recording your slideshow narration so everything is synchronized.
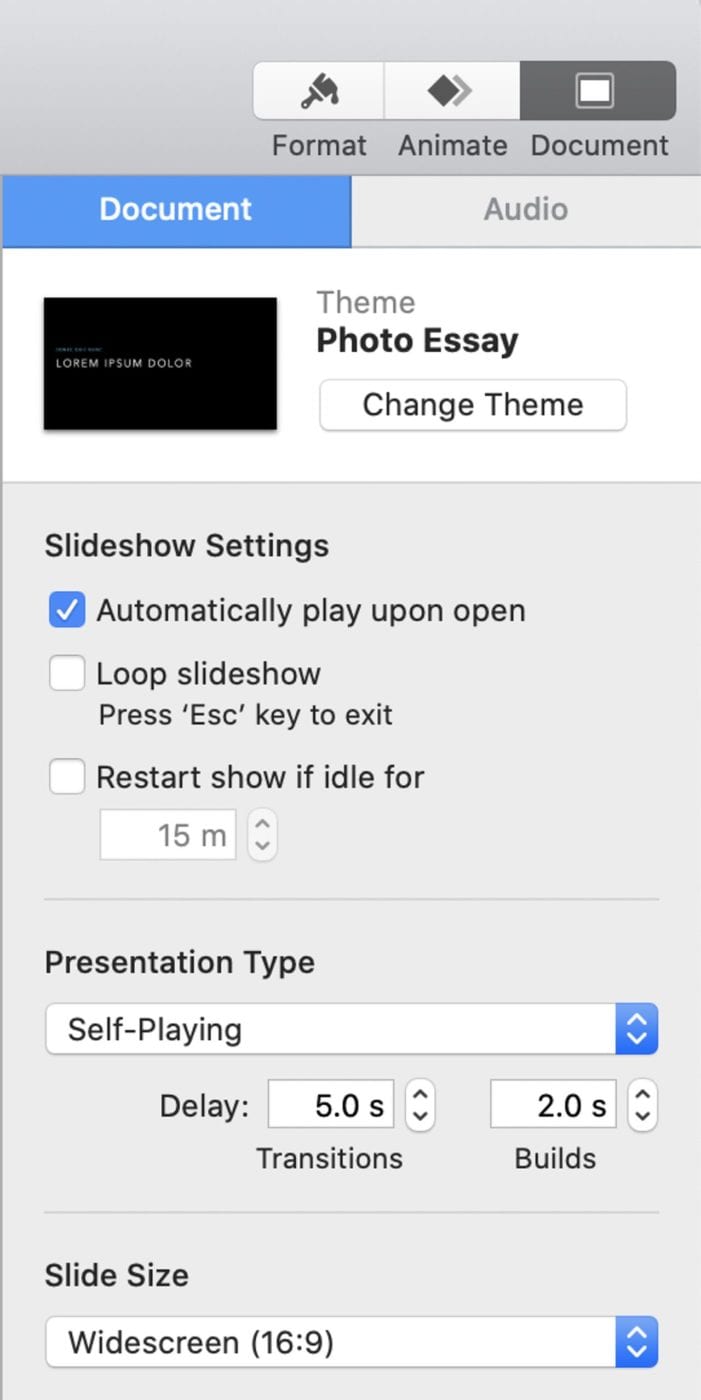
There are checkmarks for “Automatically Play Upon Open”, “Loop Slideshow” (which is good if your slideshow will be shown repeatedly on a kiosk), and “Restart show if idle for xx minutes”. These settings are useful if you wish to send a Keynote file to someone with the app and have it play automatically, but for even easier sharing, exporting the slideshow as a movie is preferable.
Export the Slideshow as a Movie
The ultimate in sharing your slideshow comes when you send a movie file that can just be opened and viewed. Let’s export the slideshow.
Select File > Export to > Movie from the menu bar. If you’ve already set up the slideshow as self-playing and have created a recording, then all you need to do is select a video resolution (1080p/HD or 720p/SD), select “Slideshow Recording”, and export the movie.
Haven’t created a recording? Select “Self Playing” instead, choose how long you want to see each slide, and then export the movie. Note that if your soundtrack is longer than the play time for your movie, it will end abruptly! It’s always a good idea to extend the time each slide is viewed so that the visual feast and soundtrack end simultaneously.
Here’s the sample video I’ve been creating for this article. Regardless of how the weather is where you live, or how you’re feeling cooped up in your home, be sure to take time to smell the roses!
The movie can be emailed, sent to another device through AirDrop, viewed on your Apple TV, or even uploaded to YouTube or Vimeo for sharing. Don’t forget, you can share a file or a full folder of videos using iCloud.
Not only is Keynote a great way for you to create presentations for work, but it’s also the best way to create photo slideshows — for free! If you have some spare time on your hands or want to keep the kids busy between online classes, making a Keynote photo slideshow of a treasured family get-together or vacation is fun and easy.


Thanks! You really saved me. The Photos slideshow and memories were not doing what I wanted them to do. With your help, Keynote came to my rescue.
I have found this very helpful for preparing a self-playing family album. Thanks many times over. Hope to add zooming and panning When I do a travel slideshow. Hope I can find as lucid instructions as yours for that
Thanks again
Fred
Thanks this is great. Hadn’t thought about using Keynote for a slideshow before, but clearly it is great.
Great idea! Can one adjust the slide if a greyed out area needs to be included? Can one add both narration, then music track?
Thanks for a great tip!
Chuck Cox